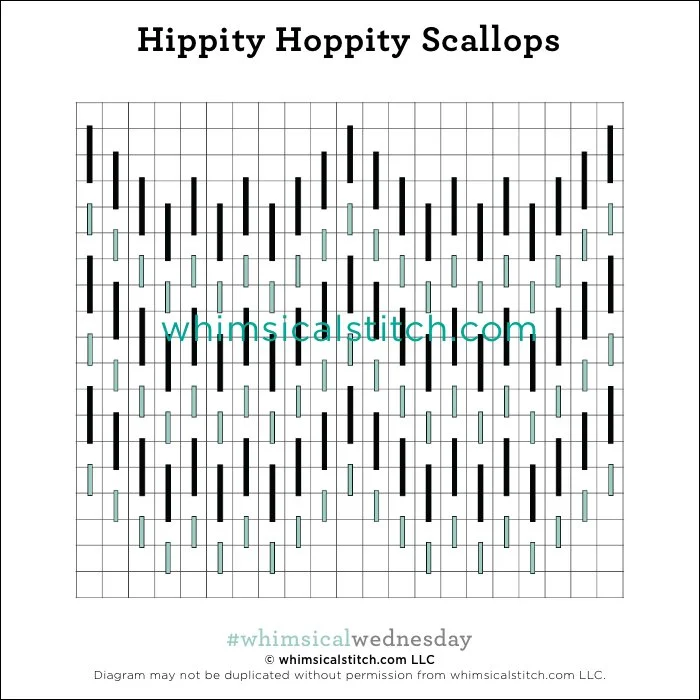
Today’s stitch is a lovely reminder of how easy it is to create variations from the core repeat pattern of virtually any stitch.

Click image to see the whimsicalstitch.com Stitch Library on pinterest.com. Includes all #whimsicalwednesday and #smallspacesunday stitch diagrams.
Click image to see #whimsicalwednesday and #smallspacesunday Stitched Sample Gallery on Instagram.
I love playing with variations. Flipping a horizontal diagram into a vertical design is a quick and easy switch. Creating a mirror image of a diagonal pattern adds lovely symmetry to opposite sides of a flower or a sail. Taking a pattern and adding a skipped row can create, well, magic.
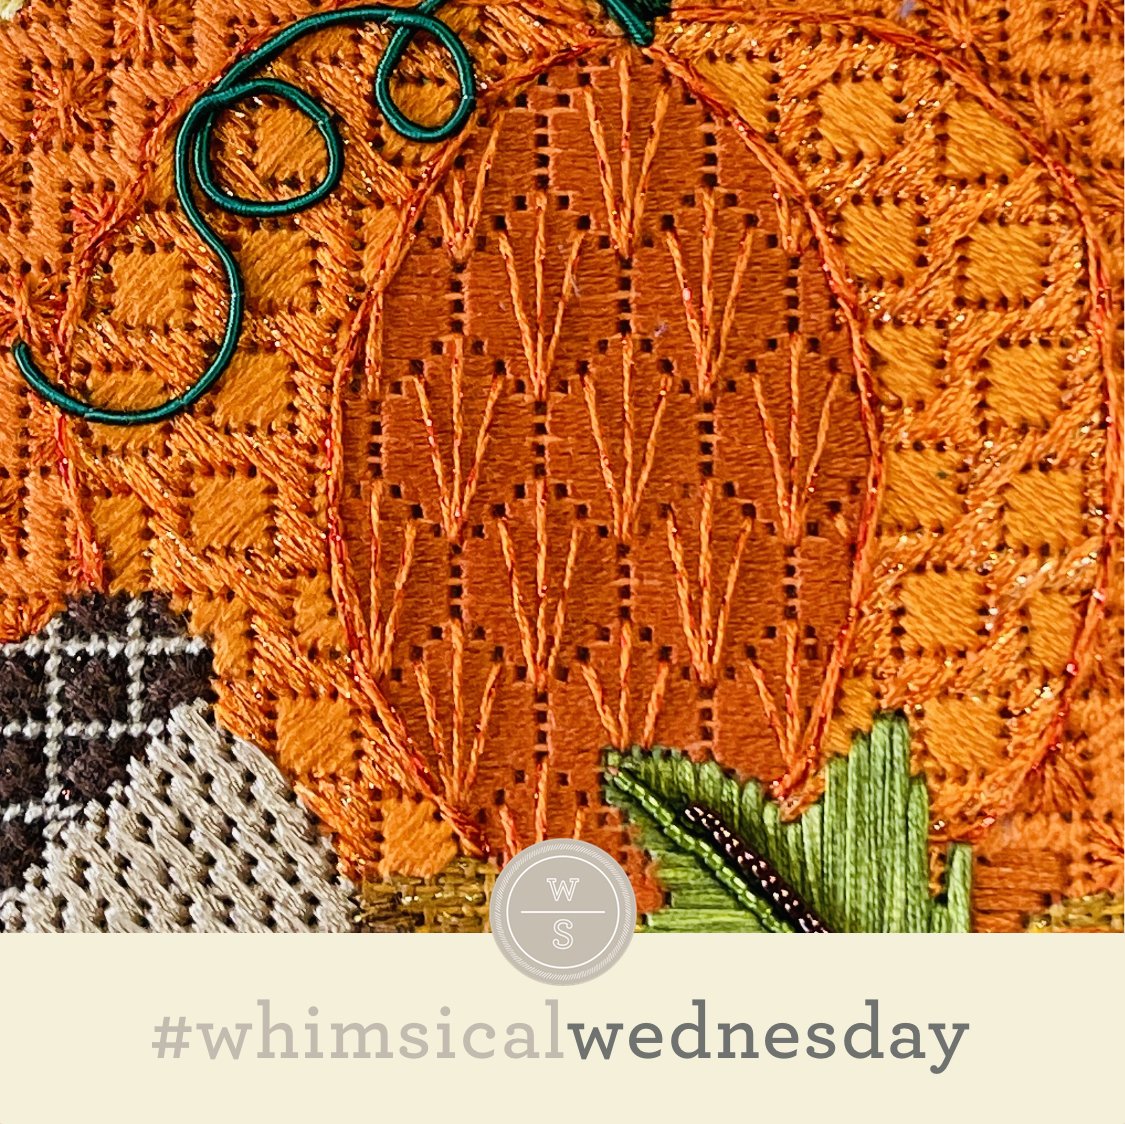
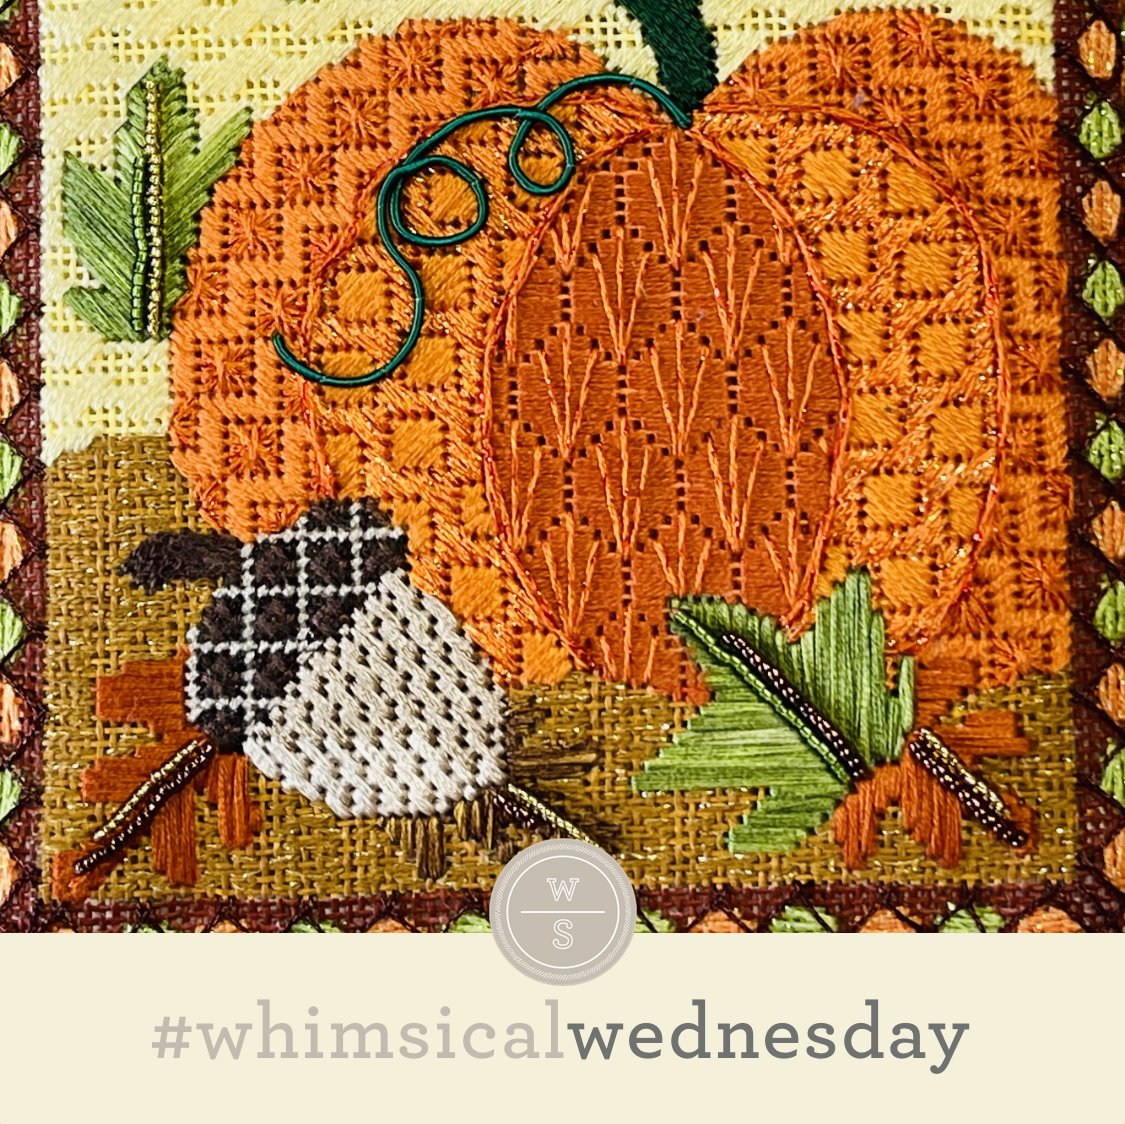
Today I cobbled together a grid by inserting horizontal rows into vertical columns and I love the results. I hope you recognize the stitch that inspired today’s stitch. (If not, no worries, here’s the link.) The stitched sample is a background on a sweet Madeline Elizabeth piece I picked up recently. I used two plies of Splendor (black lines) and 2mm S&J Designs pearls (yellow circles).
Grids are great stitches for architectural elements such as floors, walls, or fences. For 18M, I would use silk floss or a lightweight metallic such as Petite Silk Lame or Kreinik Metallics Fine Braid (#8) for any of those and change the pearl to an Upright Cross or an X (with each diagonal stitch over two rows). I’m looking forward to using this for clothing with a heavier touch. This stitch would make a great Santa coat or a fun shirt with Vineyard Silk (black lines) and tiny buttons for the yellow circles.
Click on image to see the whimsicalstitch.com Stitch Library on pinterest.com. Includes all #whimsicalwednesday and #smallspacesunday stitch diagrams.
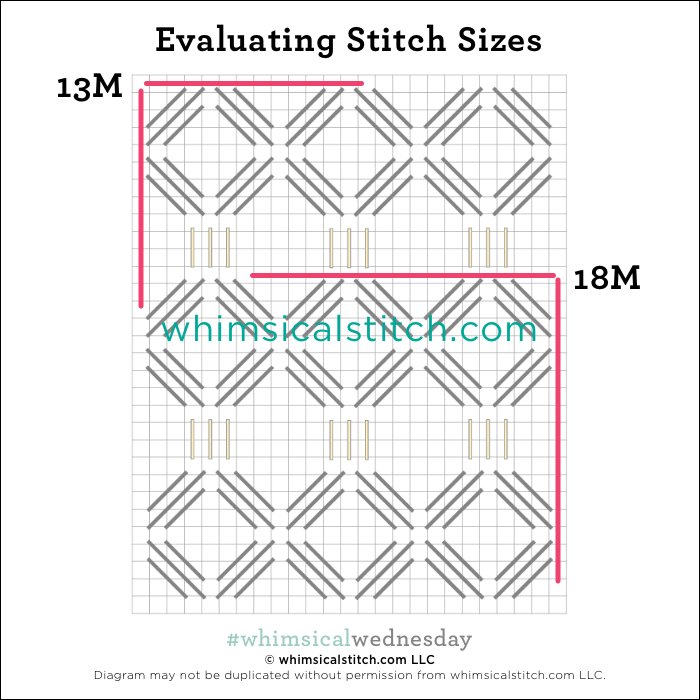
Just a reminder about how to evaluate stitches for size on your project.
As you are auditioning stitches (from any stitch source), count the number of canvas threads on the diagram that match your mesh size. And there you have what an inch of the stitch will look like. Evaluate that against the area where you plan to use the stitch and make your final decision. If you start integrating this step into your stitch selection process, you may be surprised at how many stitches you think are large are much smaller than you realize. (Or, in today’s case, the stitch is much larger than it looks.)
By (sometimes) including this step in my own process, I find I am now integrating much longer stitches than I ever thought I would. I used to think a stitch six rows long was super big. I have very much changed my tune, which has helped me expand my creativity, especially for large-space stitches.
Today’s stitch diagram, along with all other #whimsicalwednesday and #smallspacesunday stitch diagrams, can also be found on a Pinterest board here. Be sure to follow whimsicalstitch.com on Facebook, Pinterest, Instagram, and Twitter.
If you like what you see on this blog, there's more. Mary’s Whimsical Stitches is a series of three books offering contemporary how-to collections of more than 250 stitches (in each volume) for all stitchers, regardless of skill level. All books include updated and sequenced diagrams from this blog plus a collection of all-new stitches from private lessons and other class projects. Visit here to find a needlepoint retailer that carries my books.
New to needlepoint or looking for a refresher? Please download a handy how-to guide covering basic needlepoint stitches and stitch compensation techniques along with new top-line information on needlepoint materials and tools, how to handle threads, and other helpful needlepoint resources.
whimsicalstitch.com also sells Stitch Guides and Stitch Concepts for Melissa Shirley Designs, Zecca Designs, Sandra Gilmore, Purple Palm, Maggie, and Penny MacLeod, and many more. Click here to see the newest guides and click here to see the entire collection.
I hope you have the perfect spot for this stitch! Please enjoy! Have a wonderful #whimsicalwednesday!
A Note about Diagrams
I use color in diagrams to make them as clear as possible. The primary function of different colored lines is to illustrate a stitch sequence. For example, the layering of colors demonstrates you add them in that order. They can also provide ideas on integrating additional threads (one line for each color). Or, you can use the same thread for all color lines. That's where I encourage you to use your imagination for the space you are stitching!