Love to be Surprised

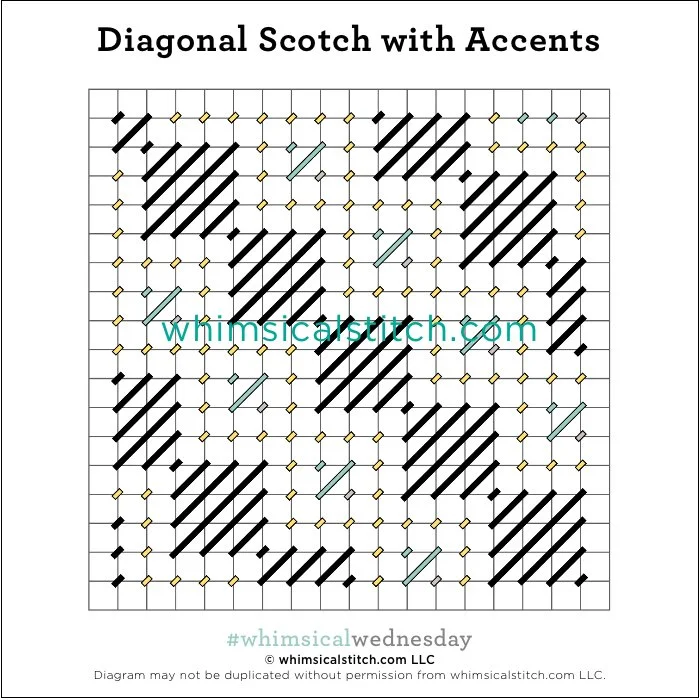
I love it when I realize I haven’t shared a really fun stitch with you. Today’s stitch checks all of my boxes. It’s open, has sparkle, and includes a Swarovski crystal. Check, check, and check.

Click image to see the whimsicalstitch.com Stitch Library on pinterest.com. Includes all #whimsicalwednesday and #smallspacesunday stitch diagrams.

Click image to see #whimsicalwednesday and #smallspacesunday Stitched Sample Gallery on Instagram.

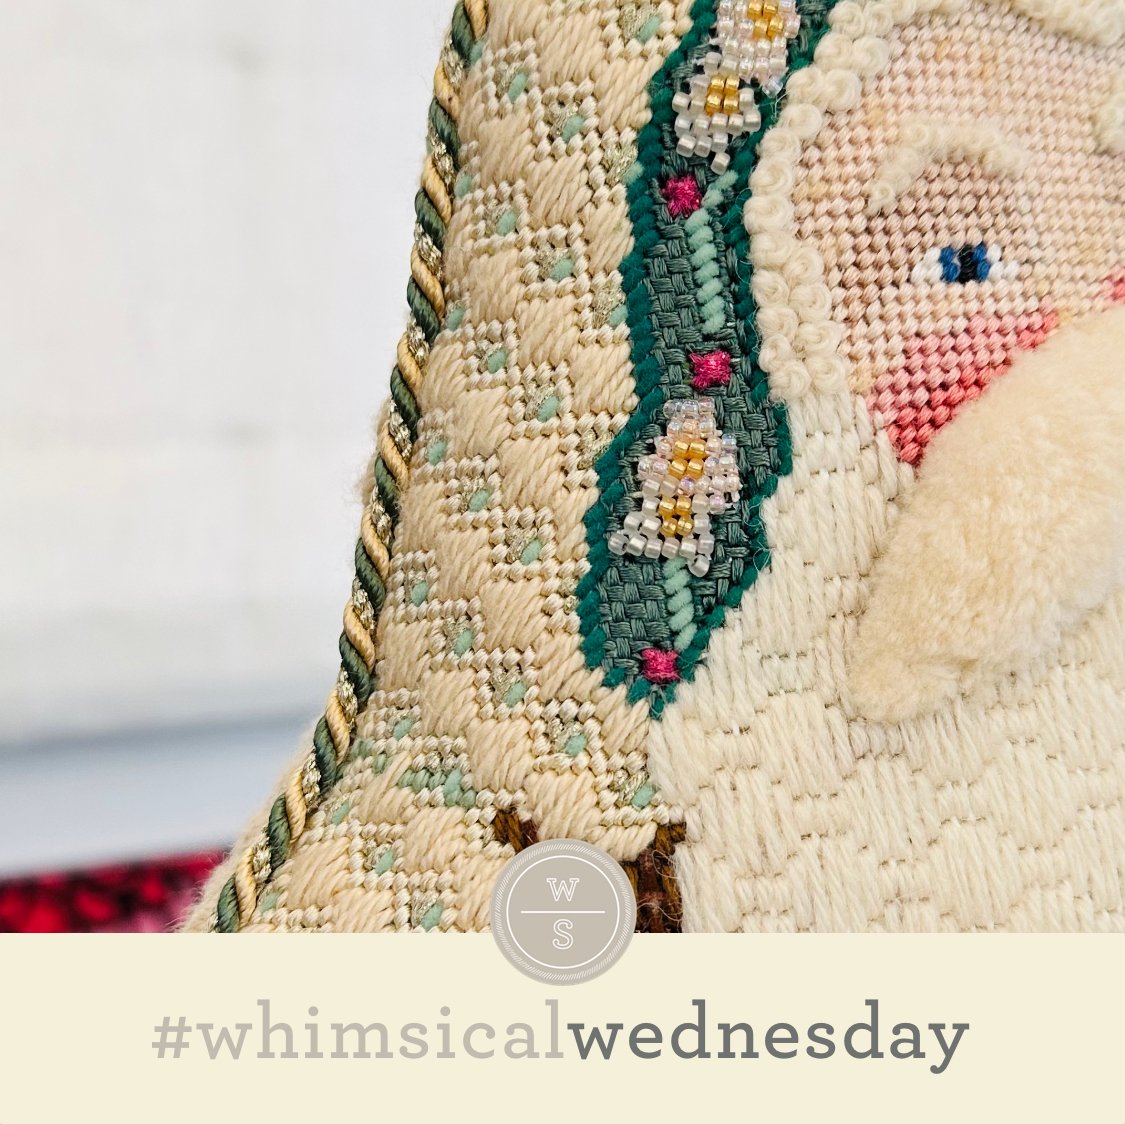
The stitched sample is one of the pumpkins from my Stitch Guide for Melissa Shirley’s Pumpkin Lane. I used two plies of orange Soie D'Alger (black lines), orange Petite Silk Lame (yellow lines), and Swarovski 3mm orange rounds (aqua circles with black lines). I love how it enhances Melissa’s beautiful shading on the pumpkin and adds zing to the area.

It will make beautiful curtains on an 18M canvas with a silk perle, such as Elegance, for the black lines, a white metallic for the yellow lines, and a traditional seed bead for the aqua circles. It would make a lovely (and sparkly) vase with a size 8 or 12 Kreinik for the black lines, Neon Rays for the yellow lines, and a size 8 bead for the aqua circles. It would be fun to stitch the yellow lines and beads in a contrasting color for a little pop.

Click on image to see the whimsicalstitch.com Stitch Library on pinterest.com. Includes all #whimsicalwednesday and #smallspacesunday stitch diagrams.

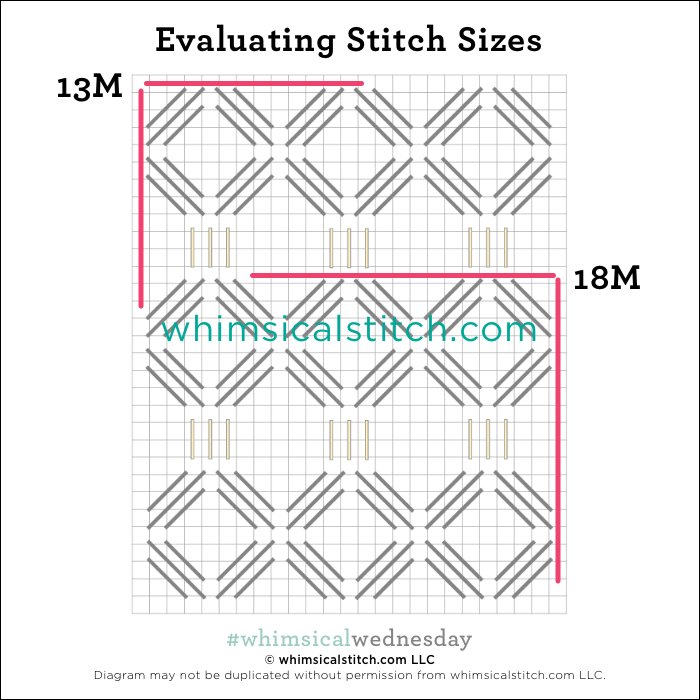
As you are auditioning stitches (from any stitch source), count the number of canvas threads on the diagram that match your mesh size. And there you have what an inch of the stitch will look like. Evaluate that against the area where you plan to use the stitch and make your final decision. If you start integrating this step into your stitch selection process, you may be surprised at how many stitches you think are large are much smaller than you realize. (Or, in today’s case, the stitch is much larger than it looks.)

By (sometimes) including this step in my own process, I find I am now integrating much longer stitches than I ever thought I would. I used to think a stitch six rows long was super big. I have very much changed my tune, which has helped me expand my creativity, especially for large-space stitches.

Today’s stitch diagram, along with all other #whimsicalwednesday and #smallspacesunday stitch diagrams, can also be found on a Pinterest board here. Be sure to follow whimsicalstitch.com on FacebookPinterestInstagram, and Twitter.

If you like what you see on this blog, there's more. Mary’s Whimsical Stitches is a series of three books offering contemporary how-to collections of more than 250 stitches (in each volume) for all stitchers, regardless of skill level. All books include updated and sequenced diagrams from this blog plus a collection of all-new stitches from private lessons and other class projects. Visit here to find a needlepoint retailer that carries my books.

New to needlepoint or looking for a refresher? Please download a handy how-to guide covering basic needlepoint stitches and stitch compensation techniques along with new top-line information on needlepoint materials and tools, how to handle threads, and other helpful needlepoint resources.

whimsicalstitch.com also sells Stitch Guides and Stitch Concepts for Melissa Shirley Designs, Zecca DesignsSandra Gilmore, Purple Palm, Maggie, and Penny MacLeod, and many more. Click here to see the newest guides and click here to see the entire collection.

I hope you have the perfect spot for this stitch! Please enjoy! Have a wonderful #whimsicalwednesday!

A Note about Diagrams
I use color in diagrams to make them as clear as possible.  The primary function of different colored lines is to illustrate a stitch sequence.  For example, the layering of colors demonstrates you add them in that order.  They can also provide ideas on integrating additional threads (one line for each color).  Or, you can use the same thread for all color lines.  That's where I encourage you to use your imagination for the space you are stitching!

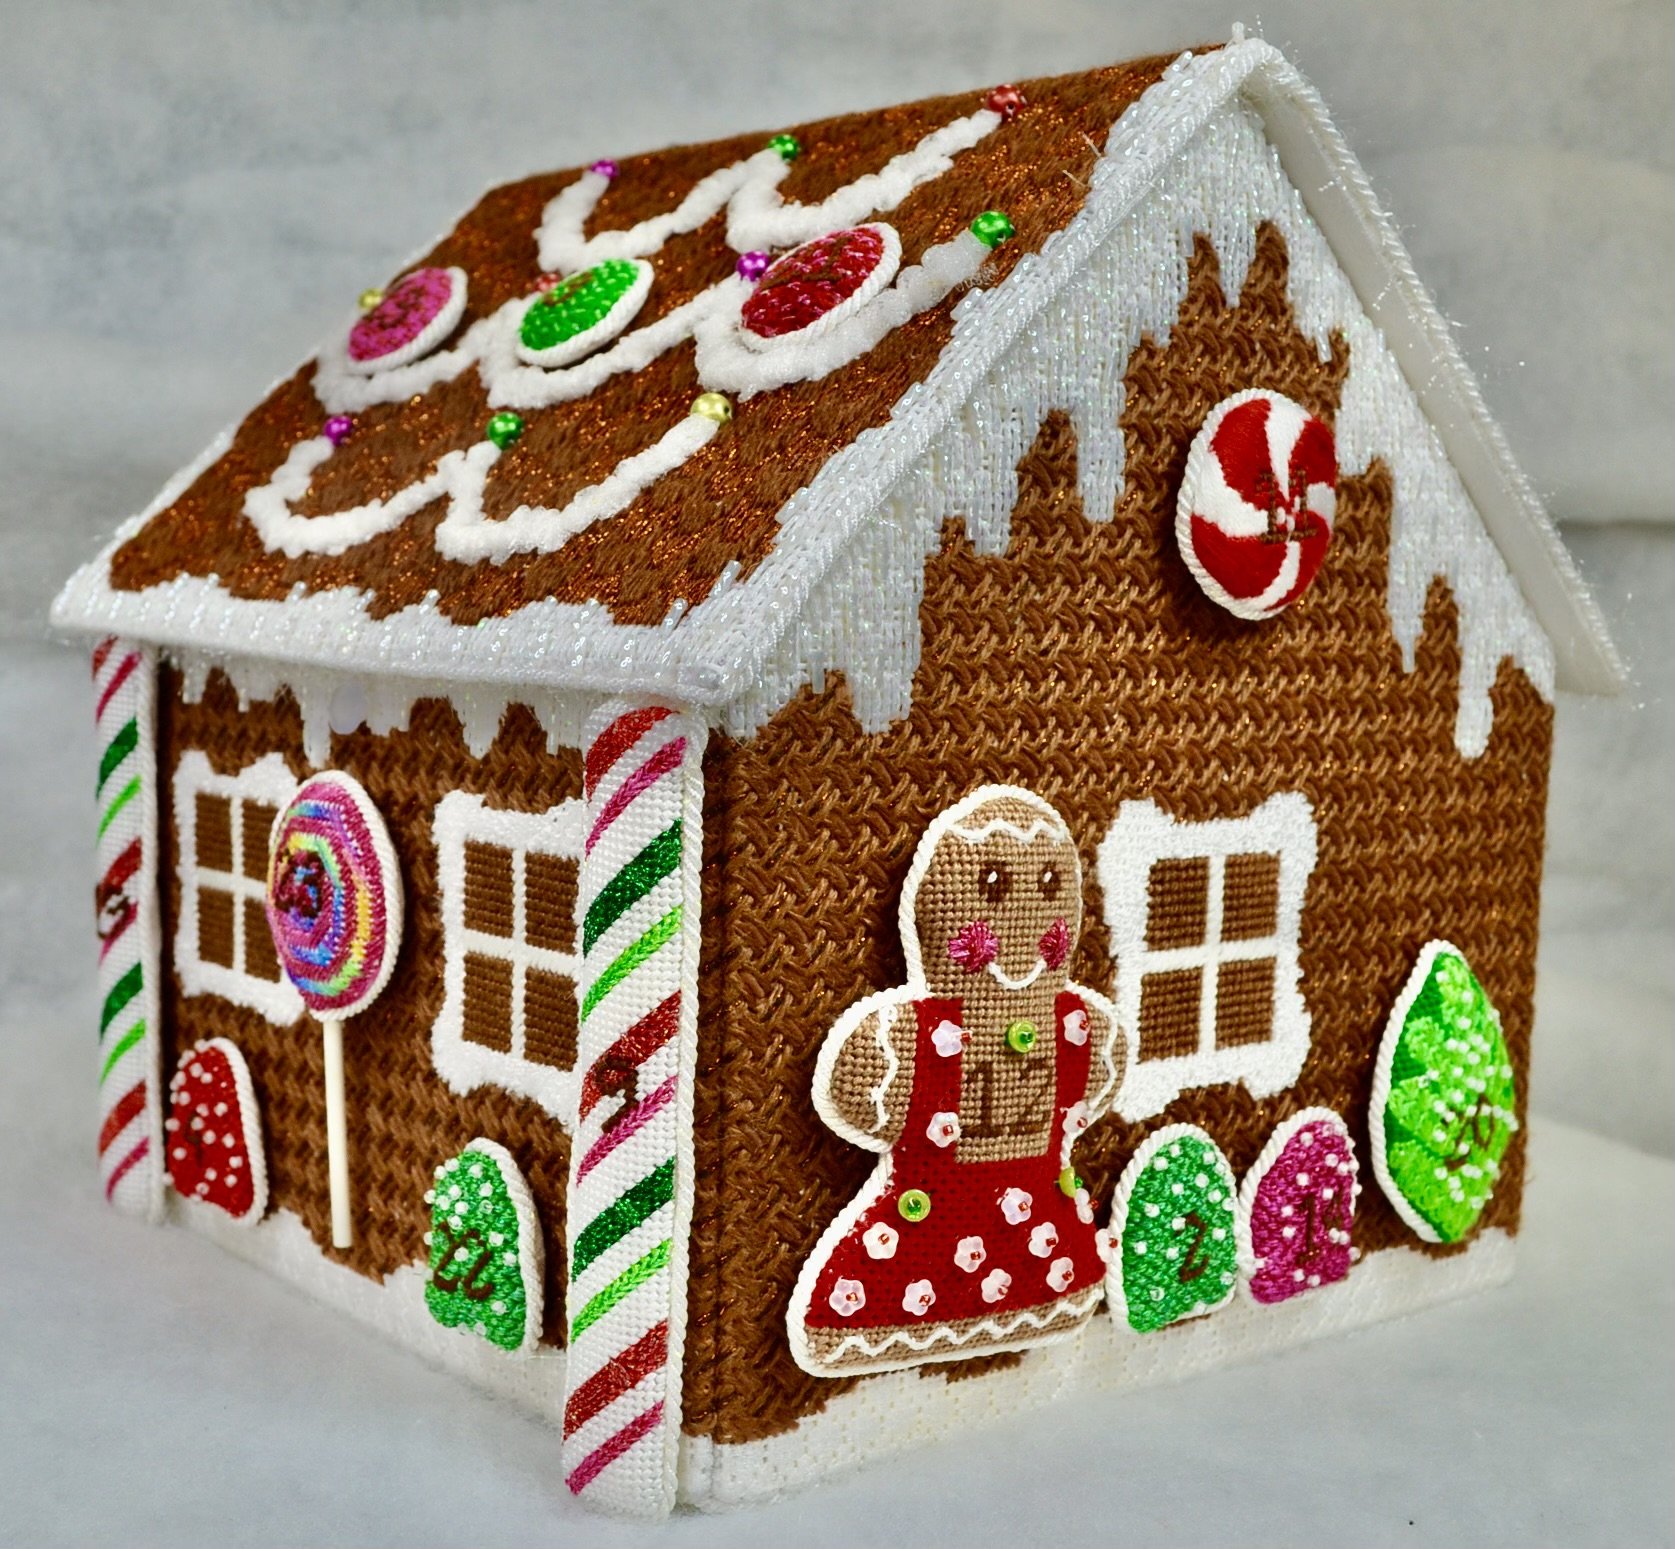
Is it Christmas Yet?

After the frenzy of the holidays, I always welcome the slower pace of the first quarter of every year. After seeing today’s stitched sample, I’m ready for the holidays to be here…now.

Click image to see the whimsicalstitch.com Stitch Library on pinterest.com. Includes all #whimsicalwednesday and #smallspacesunday stitch diagrams.

Click image to see #whimsicalwednesday and #smallspacesunday Stitched Sample Gallery on Instagram.

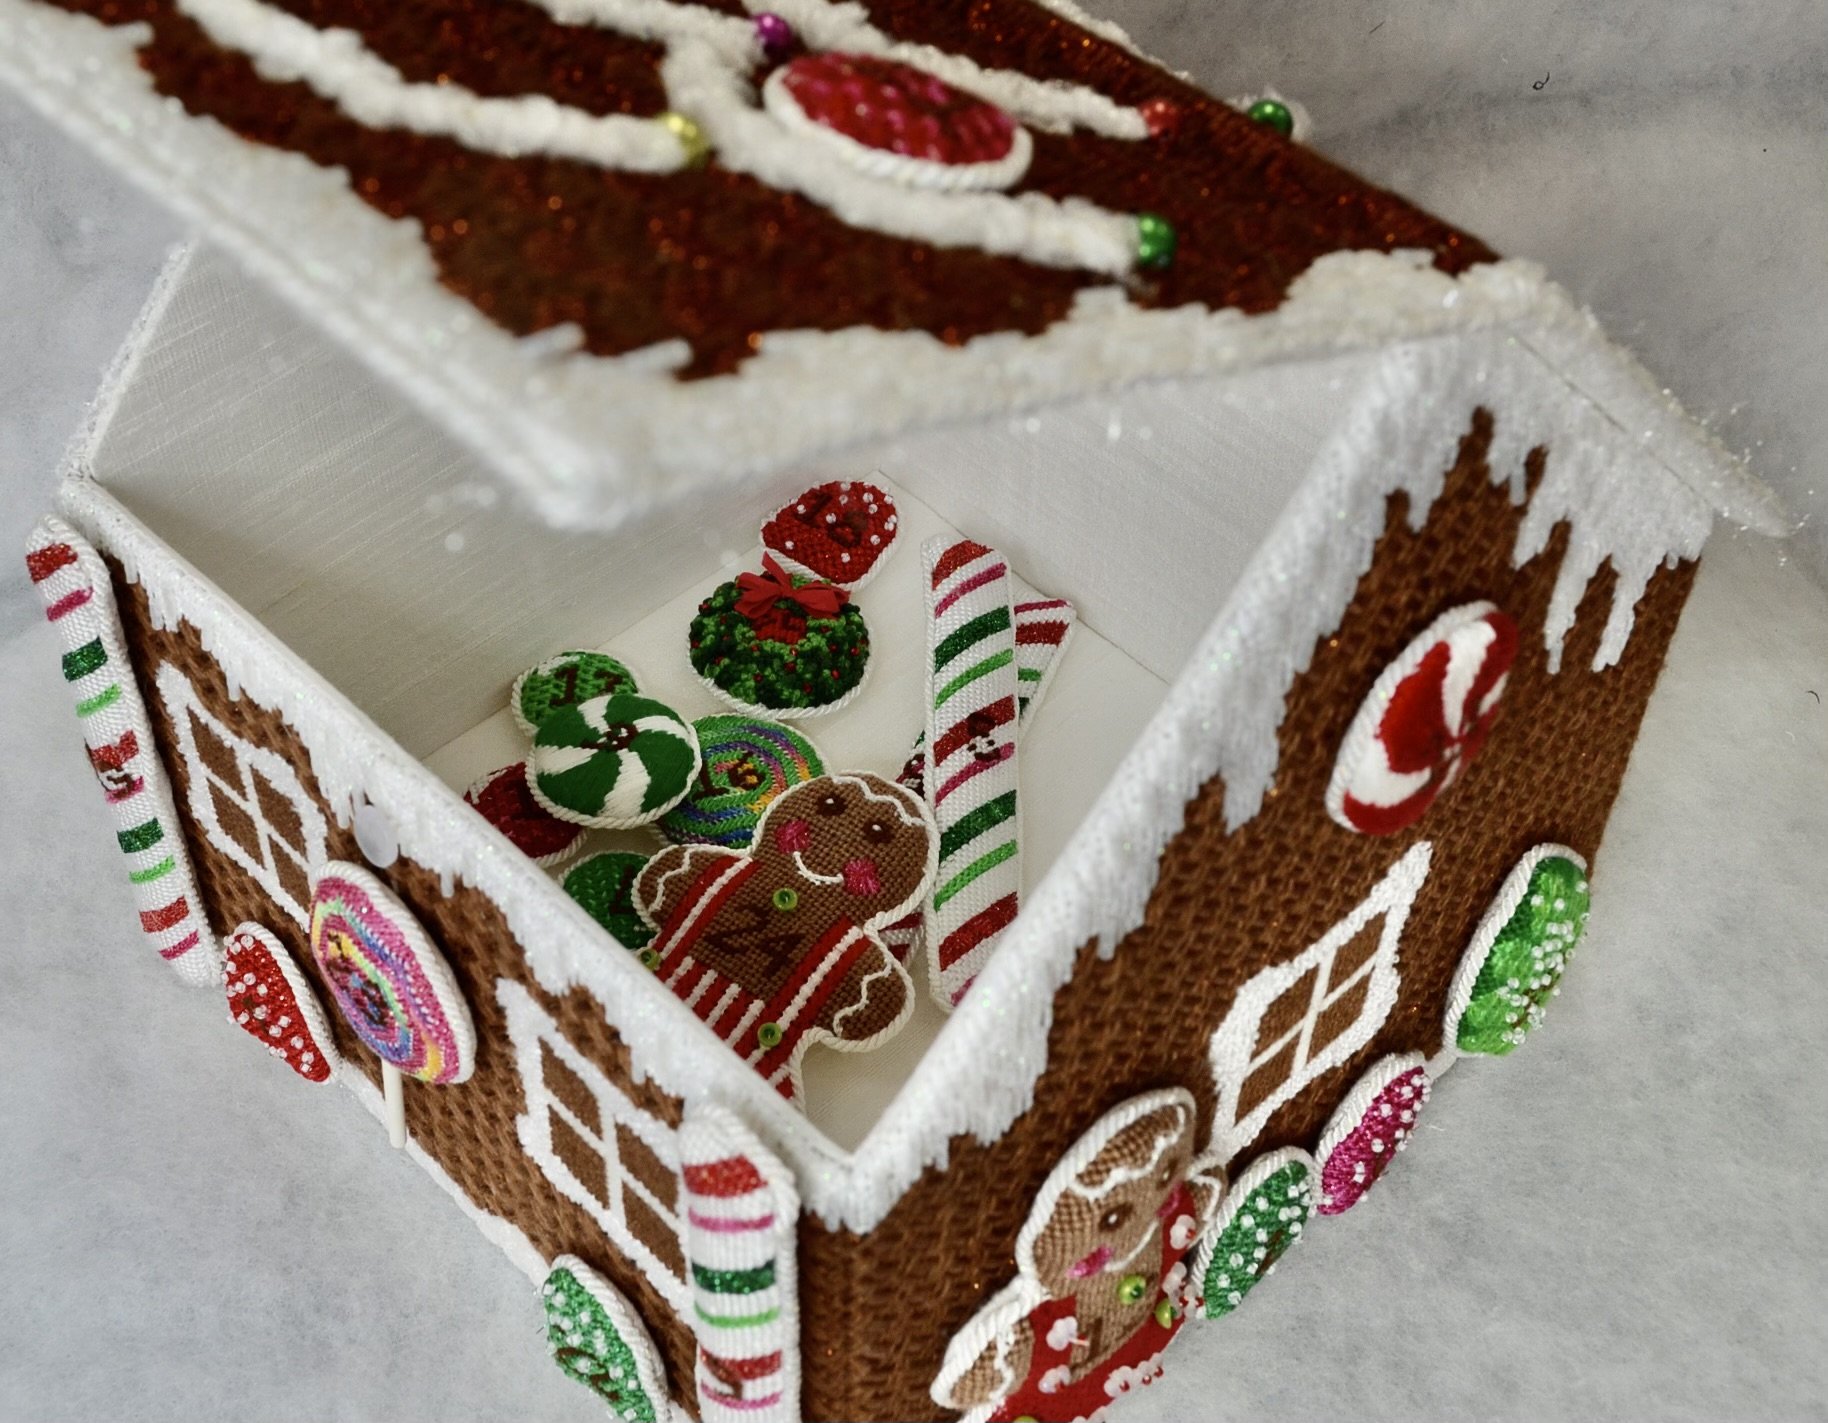
The stitch is an adorable roof on a gingerbread house that also serves as an advent calendar. (What? How cool! More on that in a minute.) The stitch is offset and alternating scallops over four rows. Super easy and absolutely adorable. Marci used Silk ‘n Ivory (black lines) and Silk Lame 18 (yellow lines). Technically, this scallop stitch is similar to most of my scallop stitches as it follows a single horizontal path. However, Marci was quite clever in changing the threads for every other scallop. (If you look long enough, you should see what I’m talking about.)

Beginning in June, The Nimble Needle in Atlanta is hosting a 10-month club with this Rachel Donley gingerbread house/advent calendar.

It’s charming and filled with fun stitches and techniques for the house and all of the advent calendar dates. Oh, and did I mention it has year-round storage? I wish all Container Store holiday storage was this cute.

You’ll receive canvases, threads, and guides each month. If interested, give the Nimble Needle a call at 404-843-8687.

Back to the stitch.

I am looking forward to using it for water with two different hues of blue or turquoise Kreinik. I also have it in mind for a young lady’s skirt with Vineyard Silk (black lines) and Flair (Just a reminder about how to evaluate stitches for size on your project. Clearly, it’s a fantastic roof. You could use two shade of Straw Silk for a roof on a country house. For even more whimsical houses, you may want to consider adding a third color, such as pink, yellow, and white for an Easter house. A lot of fun is to be had with this stitch.


Click on image to see the whimsicalstitch.com Stitch Library on pinterest.com. Includes all #whimsicalwednesday and #smallspacesunday stitch diagrams.

As you are auditioning stitches (from any stitch source), count the number of canvas threads on the diagram that match your mesh size. And there you have what an inch of the stitch will look like. Evaluate that against the area where you plan to use the stitch and make your final decision. If you start integrating this step into your stitch selection process, you may be surprised at how many stitches you think are large are much smaller than you realize. (Or, in today’s case, the stitch is much larger than it looks.)

By (sometimes) including this step in my own process, I find I am now integrating much longer stitches than I ever thought I would. I used to think a stitch six rows long was super big. I have very much changed my tune, which has helped me expand my creativity, especially for large-space stitches.

Today’s stitch diagram, along with all other #whimsicalwednesday and #smallspacesunday stitch diagrams, can also be found on a Pinterest board here. Be sure to follow whimsicalstitch.com on FacebookPinterestInstagram, and Twitter.

If you like what you see on this blog, there's more. Mary’s Whimsical Stitches is a series of three books offering contemporary how-to collections of more than 250 stitches (in each volume) for all stitchers, regardless of skill level. All books include updated and sequenced diagrams from this blog plus a collection of all-new stitches from private lessons and other class projects. Visit here to find a needlepoint retailer that carries my books.

New to needlepoint or looking for a refresher? Please download a handy how-to guide covering basic needlepoint stitches and stitch compensation techniques along with new top-line information on needlepoint materials and tools, how to handle threads, and other helpful needlepoint resources.

whimsicalstitch.com also sells Stitch Guides and Stitch Concepts for Melissa Shirley Designs, Zecca DesignsSandra Gilmore, Purple Palm, Maggie, and Penny MacLeod, and many more. Click here to see the newest guides and click here to see the entire collection.

I hope you have the perfect spot for this stitch! Please enjoy! Have a wonderful #whimsicalwednesday!

A Note about Diagrams
I use color in diagrams to make them as clear as possible.  The primary function of different colored lines is to illustrate a stitch sequence.  For example, the layering of colors demonstrates you add them in that order.  They can also provide ideas on integrating additional threads (one line for each color).  Or, you can use the same thread for all color lines.  That's where I encourage you to use your imagination for the space you are stitching!

The Teacher Learns

Today’s adorable stitch is an example of how the students teach me things in my own classes. 

Click image to see the whimsicalstitch.com Stitch Library on pinterest.com. Includes all #whimsicalwednesday and #smallspacesunday stitch diagrams.

Click image to see #whimsicalwednesday and #smallspacesunday Stitched Sample Gallery on Instagram.

The stitched sample is a Santa cap on an adorable Danji ornament. The stitcher used Petite Very Velvet for the black lines, a red metallic for the aqua lines, white Neon Rays+ for the yellow lines, and a Sundance seed bead for the aqua circle.

It’s a wonderfully dramatic stitch that works so well on the cap. I’ve done variations of this (but I like this one better), so I speak from experience when I say to pay close attention to the diagram. What helped me was to break the stitch (as diagramed above) into four quadrants. Imagine a line through the beads in both directions from edge to edge. Voila. You have the quadrants I am describing.

Ignore all the yellow lines and focus on the four quadrants of black lines. They are perfectly aligned on the horizontal and vertical paths. When you stitch this, stitch it one quadrant at a time. The quadrants create another area in the center that is slightly different, which is why I want you to ignore it because it is a huge distraction. All of the centers are filled with the same yellow lines, which can be deceiving, which is why I encourage you to focus on the quadrants as you stitch this stitch. Just remind yourself that it will emerge naturally as you stitch the groups of stitches.

Clearly, this is a stitch for an area screaming for attention. So my mind instantly goes to a pumpkin. (I LOVE Halloween needlepoint.) My dream pumpkin will use silk floss for the black lines, Painters Threads Shimmer Ribbon for the yellow lines, a solid bright orange metallic for the aqua lines, and an oversized bead for the aqua circles. It will also make a very handsome winter coat with Vineyard Silk or Pepper Pot Silk for the black lines, Flair for the yellow lines, Silk Lame for the aqua lines, and a seed bead for the aqua circles.

Click on image to see the whimsicalstitch.com Stitch Library on pinterest.com. Includes all #whimsicalwednesday and #smallspacesunday stitch diagrams.

Just a reminder about how to evaluate stitches for size on your project.

As you are auditioning stitches (from any stitch source), count the number of canvas threads on the diagram that match your mesh size. And there you have what an inch of the stitch will look like. Evaluate that against the area where you plan to use the stitch and make your final decision. If you start integrating this step into your stitch selection process, you may be surprised at how many stitches you think are large are much smaller than you realize. (Or, in today’s case, the stitch is much larger than it looks.)

By (sometimes) including this step in my own process, I find I am now integrating much longer stitches than I ever thought I would. I used to think a stitch six rows long was super big. I have very much changed my tune, which has helped me expand my creativity, especially for large-space stitches.

Today’s stitch diagram, along with all other #whimsicalwednesday and #smallspacesunday stitch diagrams, can also be found on a Pinterest board here. Be sure to follow whimsicalstitch.com on FacebookPinterestInstagram, and Twitter.

If you like what you see on this blog, there's more. Mary’s Whimsical Stitches is a series of three books offering contemporary how-to collections of more than 250 stitches (in each volume) for all stitchers, regardless of skill level. All books include updated and sequenced diagrams from this blog plus a collection of all-new stitches from private lessons and other class projects. Visit here to find a needlepoint retailer that carries my books.

New to needlepoint or looking for a refresher? Please download a handy how-to guide covering basic needlepoint stitches and stitch compensation techniques along with new top-line information on needlepoint materials and tools, how to handle threads, and other helpful needlepoint resources.

whimsicalstitch.com also sells Stitch Guides and Stitch Concepts for Melissa Shirley Designs, Zecca DesignsSandra Gilmore, Purple Palm, Maggie, and Penny MacLeod, and many more. Click here to see the newest guides and click here to see the entire collection.

I hope you have the perfect spot for this stitch! Please enjoy! Have a wonderful #whimsicalwednesday!

A Note about Diagrams
I use color in diagrams to make them as clear as possible.  The primary function of different colored lines is to illustrate a stitch sequence.  For example, the layering of colors demonstrates you add them in that order.  They can also provide ideas on integrating additional threads (one line for each color).  Or, you can use the same thread for all color lines.  That's where I encourage you to use your imagination for the space you are stitching!

Didn’t Expect to End Up Here

The moral of today’s post is to follow that tiny nagging feeling. Let’s just leave it at I was not anticipating sharing a stitch with three threads AND pearls today.

Click image to see the whimsicalstitch.com Stitch Library on pinterest.com. Includes all #whimsicalwednesday and #smallspacesunday stitch diagrams.

Click image to see #whimsicalwednesday and #smallspacesunday Stitched Sample Gallery on Instagram.

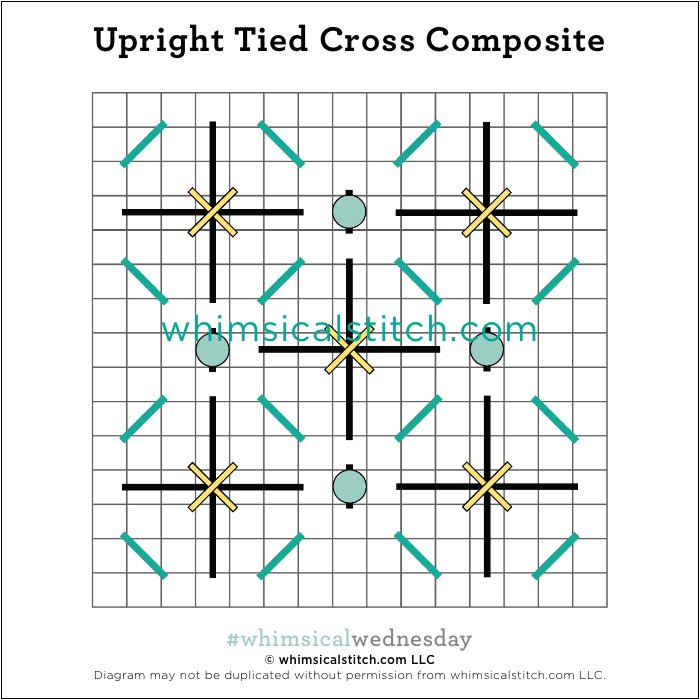
The Upright Tied Crosses in today’s stitch are slightly larger than what I typically think of as Upright Tied Crosses. The bottom stitches (black lines) are six rows long versus the four illustrated in the link. My original plan a stitch with the Upright Crosses (black and aqua lines) and the pearls (aqua circles) only. But I could tell something was missing, so I took some inspiration from Kelly Clark and added the diagonal stitches inside the emerging squares to create a stronger purpose and more definition to the pearls. And voila! The stitched sample uses three plies of Splendor (black lines) with Kreinik 1/16” ribbon on top (yellow lines). The diamonds are created with Shimmer Ribbon (turquoise lines) and SJ Designs 2mm pearls with white beading thread (aqua circles with black lines).

The stitched sample is a very feminine bedspread for an upcoming Stitch Concept. Along those lines, it will make a very pretty dress for a flapper with a simple addition of a contrasting color for the yellow lines and a bead or even a Swarovski crystal for the pearl. I also think it will make a fun toy box with red and silver metallics for the black and yellow lines, red silk floss for the turquoise lines, and bright blue beads for the aqua circles.

Click on image to see the whimsicalstitch.com Stitch Library on pinterest.com. Includes all #whimsicalwednesday and #smallspacesunday stitch diagrams.

Just a reminder about how to evaluate stitches for size on your project.

As you are auditioning stitches (from any stitch source), count the number of canvas threads on the diagram that match your mesh size. And there you have what an inch of the stitch will look like. Evaluate that against the area where you plan to use the stitch and make your final decision. If you start integrating this step into your stitch selection process, you may be surprised at how many stitches you think are large are much smaller than you realize. (Or, in today’s case, the stitch is much larger than it looks.)

By (sometimes) including this step in my own process, I find I am now integrating much longer stitches than I ever thought I would. I used to think a stitch six rows long was super big. I have very much changed my tune, which has helped me expand my creativity, especially for large-space stitches.

Today’s stitch diagram, along with all other #whimsicalwednesday and #smallspacesunday stitch diagrams, can also be found on a Pinterest board here. Be sure to follow whimsicalstitch.com on FacebookPinterestInstagram, and Twitter.

If you like what you see on this blog, there's more. Mary’s Whimsical Stitches is a series of three books offering contemporary how-to collections of more than 250 stitches (in each volume) for all stitchers, regardless of skill level. All books include updated and sequenced diagrams from this blog plus a collection of all-new stitches from private lessons and other class projects. Visit here to find a needlepoint retailer that carries my books.

New to needlepoint or looking for a refresher? Please download a handy how-to guide covering basic needlepoint stitches and stitch compensation techniques along with new top-line information on needlepoint materials and tools, how to handle threads, and other helpful needlepoint resources.

whimsicalstitch.com also sells Stitch Guides and Stitch Concepts for Melissa Shirley Designs, Zecca DesignsSandra Gilmore, Purple Palm, Maggie, and Penny MacLeod, and many more. Click here to see the newest guides and click here to see the entire collection.

I hope you have the perfect spot for this stitch! Please enjoy! Have a wonderful #whimsicalwednesday!

A Note about Diagrams
I use color in diagrams to make them as clear as possible.  The primary function of different colored lines is to illustrate a stitch sequence.  For example, the layering of colors demonstrates you add them in that order.  They can also provide ideas on integrating additional threads (one line for each color).  Or, you can use the same thread for all color lines.  That's where I encourage you to use your imagination for the space you are stitching!

Wait, What?

I never imagined I would be bragging about, let alone sharing with pride, an oversized beetle. Yet here we are.

Click image to see the whimsicalstitch.com Stitch Library on pinterest.com. Includes all #whimsicalwednesday and #smallspacesunday stitch diagrams.

Click image to see #whimsicalwednesday and #smallspacesunday Stitched Sample Gallery on Instagram.

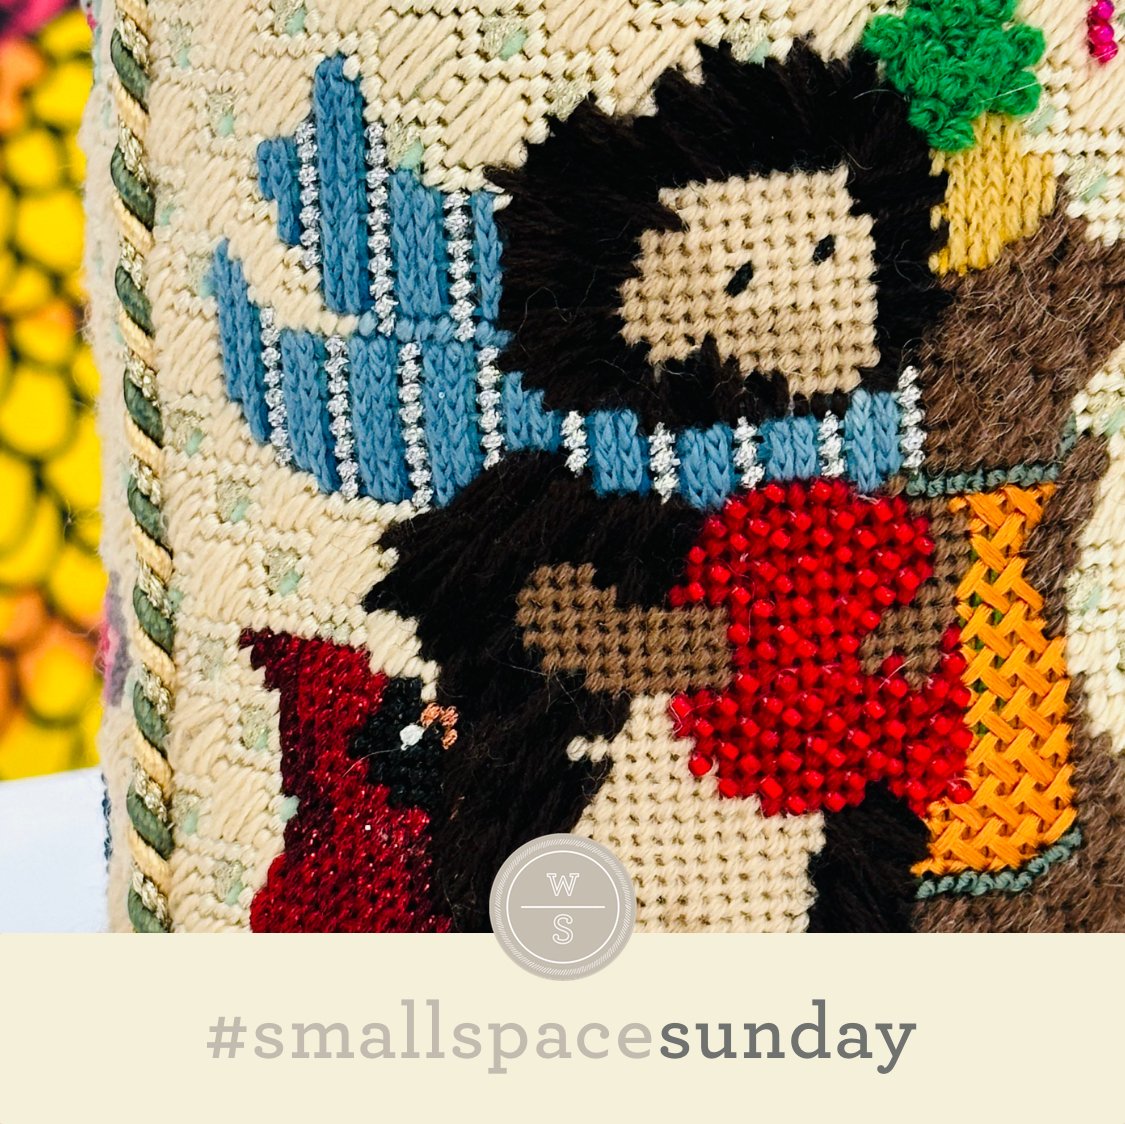
The stitched sample is a beard stitched with Appleton Wool on 13M, stitched by yours truly forever and a day ago. (Tangent. The hair is a decent example of Double French Knots, which I chat about in Book 1 and the Essentials guide.)

I love Beetle Stitches in their simplest forms (such as today) because it adds interest without overwhelming surrounding areas. The smoothness of the stitch adds a certain elegance. I also love the dressed-up versions, but this stitch is perfect for the beard.

Appleton added a little puff to the beard. It will be adorable to replicate that on a bedspread with Appleton (on 13M) or single-strand silk such as Pepper Pot Silk or Vineyard Silk (on 18M). It will make a fantastic roof with Rainbow Linen. Don’t forget to consider flipping the diagram 90° for a taller version of the stitch. That would be great for clothing with silk floss.

Click on image to see the whimsicalstitch.com Stitch Library on pinterest.com. Includes all #whimsicalwednesday and #smallspacesunday stitch diagrams.

Just a reminder about how to evaluate stitches for size on your project.

As you are auditioning stitches (from any stitch source), count the number of canvas threads on the diagram that match your mesh size. And there you have what an inch of the stitch will look like. Evaluate that against the area where you plan to use the stitch and make your final decision. If you start integrating this step into your stitch selection process, you may be surprised at how many stitches you think are large are much smaller than you realize. (Or, in today’s case, the stitch is much larger than it looks.)

By (sometimes) including this step in my own process, I find I am now integrating much longer stitches than I ever thought I would. I used to think a stitch six rows long was super big. I have very much changed my tune, which has helped me expand my creativity, especially for large-space stitches.

Today’s stitch diagram, along with all other #whimsicalwednesday and #smallspacesunday stitch diagrams, can also be found on a Pinterest board here. Be sure to follow whimsicalstitch.com on FacebookPinterestInstagram, and Twitter.

If you like what you see on this blog, there's more. Mary’s Whimsical Stitches is a series of three books offering contemporary how-to collections of more than 250 stitches (in each volume) for all stitchers, regardless of skill level. All books include updated and sequenced diagrams from this blog plus a collection of all-new stitches from private lessons and other class projects. Visit here to find a needlepoint retailer that carries my books.

New to needlepoint or looking for a refresher? Please download a handy how-to guide covering basic needlepoint stitches and stitch compensation techniques along with new top-line information on needlepoint materials and tools, how to handle threads, and other helpful needlepoint resources.

whimsicalstitch.com also sells Stitch Guides and Stitch Concepts for Melissa Shirley Designs, Zecca DesignsSandra Gilmore, Purple Palm, Maggie, and Penny MacLeod, and many more. Click here to see the newest guides and click here to see the entire collection.

I hope you have the perfect spot for this stitch! Please enjoy! Have a wonderful #whimsicalwednesday!

A Note about Diagrams
I use color in diagrams to make them as clear as possible.  The primary function of different colored lines is to illustrate a stitch sequence.  For example, the layering of colors demonstrates you add them in that order.  They can also provide ideas on integrating additional threads (one line for each color).  Or, you can use the same thread for all color lines.  That's where I encourage you to use your imagination for the space you are stitching!
Way to Go!

My favorite week of the year is between Christmas and New Year’s Day. It’s a week that is singularly mine to do with what I want. Vacation? Sure! Great timing. Putting away the holidays? Sure! Nothing like a clean start to the year. Start some new Halloween ornaments? What a lovely idea.

Start a new Christmas stocking? Not in my world. So, this is a shout-out to @millennial_needlepointer for braving a stocking so soon after the holidays. Was happy to help her with a stitch suggestion as I massively giggled (and finished one of the above-mentioned Halloween ornaments).

Click image to see the whimsicalstitch.com Stitch Library on pinterest.com. Includes all #whimsicalwednesday and #smallspacesunday stitch diagrams.

Click image to see #whimsicalwednesday and #smallspacesunday Stitched Sample Gallery on Instagram.

The stitched sample is a sky on a stocking. Alexandra used one ply of blue Watercolours (black lines) and Fyre Werks (yellow lines) on 18M. (She also gets a high five for stitching an 18M stocking. #team13mstockingsonly.)

This stitch is directly related to two stitches that have been shared here. Its direct relative is a Woven Hungarian variant I shared here many moons ago. This stitch is nothing more than removing the stitches that are five rows wide from that stitch. I named it as I did because it is so similar to the Dolly stitch I shared here as well.

As for the why I removed the stitches over five rows? The Woven Hungarian variation fit the sky as painted perfectly. That’s why I went straight to that stitch. However, I wanted it to be lighter because it was a sky and the adorable elephants were the stars here. So, boom, bye bye stitches over five rows for a lighter touch that fits the painted space perfectly.

I’m looking forward to using this stitch for more clothing with Vineyard Silk and Silk Lame 18 for a cozy sweater, also on 13M. It will also make a jazzy pumpkin with 2-3 plies of silk floss and Fyre Werks on 18M. I’m also toying with the idea of replacing the yellow lines with a larger sequin with a size 11 seed bead or bi-cone to attach it. A lot of fun can be had here!

Click on image to see the whimsicalstitch.com Stitch Library on pinterest.com. Includes all #whimsicalwednesday and #smallspacesunday stitch diagrams.

Just a reminder about how to evaluate stitches for size on your project.

As you are auditioning stitches (from any stitch source), count the number of canvas threads on the diagram that match your mesh size. And there you have what an inch of the stitch will look like. Evaluate that against the area where you plan to use the stitch and make your final decision. If you start integrating this step into your stitch selection process, you may be surprised at how many stitches you think are large are much smaller than you realize. (Or, in today’s case, the stitch is much larger than it looks.)

By (sometimes) including this step in my own process, I find I am now integrating much longer stitches than I ever thought I would. I used to think a stitch six rows long was super big. I have very much changed my tune, which has helped me expand my creativity, especially for large-space stitches.

Today’s stitch diagram, along with all other #whimsicalwednesday and #smallspacesunday stitch diagrams, can also be found on a Pinterest board here. Be sure to follow whimsicalstitch.com on FacebookPinterestInstagram, and Twitter.

If you like what you see on this blog, there's more. Mary’s Whimsical Stitches is a series of three books offering contemporary how-to collections of more than 250 stitches (in each volume) for all stitchers, regardless of skill level. All books include updated and sequenced diagrams from this blog plus a collection of all-new stitches from private lessons and other class projects. Visit here to find a needlepoint retailer that carries my books.

New to needlepoint or looking for a refresher? Please download a handy how-to guide covering basic needlepoint stitches and stitch compensation techniques along with new top-line information on needlepoint materials and tools, how to handle threads, and other helpful needlepoint resources.

whimsicalstitch.com also sells Stitch Guides and Stitch Concepts for Melissa Shirley Designs, Zecca DesignsSandra Gilmore, Purple Palm, Maggie, and Penny MacLeod, and many more. Click here to see the newest guides and click here to see the entire collection.

I hope you have the perfect spot for this stitch! Please enjoy! Have a wonderful #whimsicalwednesday!

A Note about Diagrams
I use color in diagrams to make them as clear as possible.  The primary function of different colored lines is to illustrate a stitch sequence.  For example, the layering of colors demonstrates you add them in that order.  They can also provide ideas on integrating additional threads (one line for each color).  Or, you can use the same thread for all color lines.  That's where I encourage you to use your imagination for the space you are stitching!

Santa’s Cute Pants

In unsurprising news, Santa is back to share another stitch with us. It’s a long forgotten stitch that I am so excited to have re-discovered as I see lots of future projects where it will look great!

Click image to see the whimsicalstitch.com Stitch Library on pinterest.com. Includes all #whimsicalwednesday and #smallspacesunday stitch diagrams.

Click image to see #whimsicalwednesday and #smallspacesunday Stitched Sample Gallery on Instagram.

Quick programming note: I will be taking off until after the first of the year. I look forward to starting another new year of stitching with you!

Back to today’s stitch. The stitched sample uses Very Velvet (black lines) and size 12 or 16 blue Kreinik (yellow lines) on 13M. (Remember…I stitched these in the late 90’s…so that’s why I can’t remember every detail.) I recommend adding the diamonds in columns, always starting the next diamond from its outermost edge. This will help with the center stitch, as it ends just under the outermost stitch from the preceding diamond. Take a look at the stitched sample, and you’ll see I flipped the direction of the yellow lines to face toward the pants’ center line.

I’m looking forward to using this stitch for more clothing with Vineyard Silk and Silk Lame 18 for a cozy sweater, also on 13M. It will also make a jazzy pumpkin with 2-3 plies of silk floss and Fyre Werks on 18M. I’m also toying with the idea of replacing the yellow lines with a larger sequin with a size 11 seed bead or bi-cone to attach it. A lot of fun can be had here!

Click on image to see the whimsicalstitch.com Stitch Library on pinterest.com. Includes all #whimsicalwednesday and #smallspacesunday stitch diagrams.

Just a reminder about how to evaluate stitches for size on your project.

As you are auditioning stitches (from any stitch source), count the number of canvas threads on the diagram that match your mesh size. And there you have what an inch of the stitch will look like. Evaluate that against the area where you plan to use the stitch and make your final decision. If you start integrating this step into your stitch selection process, you may be surprised at how many stitches you think are large are much smaller than you realize. (Or, in today’s case, the stitch is much larger than it looks.)

By (sometimes) including this step in my own process, I find I am now integrating much longer stitches than I ever thought I would. I used to think a stitch six rows long was super big. I have very much changed my tune, which has helped me expand my creativity, especially for large-space stitches.

Today’s stitch diagram, along with all other #whimsicalwednesday and #smallspacesunday stitch diagrams, can also be found on a Pinterest board here. Be sure to follow whimsicalstitch.com on FacebookPinterestInstagram, and Twitter.

If you like what you see on this blog, there's more. Mary’s Whimsical Stitches is a series of three books offering contemporary how-to collections of more than 250 stitches (in each volume) for all stitchers, regardless of skill level. All books include updated and sequenced diagrams from this blog plus a collection of all-new stitches from private lessons and other class projects. Visit here to find a needlepoint retailer that carries my books.

New to needlepoint or looking for a refresher? Please download a handy how-to guide covering basic needlepoint stitches and stitch compensation techniques along with new top-line information on needlepoint materials and tools, how to handle threads, and other helpful needlepoint resources.

whimsicalstitch.com also sells Stitch Guides and Stitch Concepts for Melissa Shirley Designs, Zecca DesignsSandra Gilmore, Purple Palm, Maggie, and Penny MacLeod, and many more. Click here to see the newest guides and click here to see the entire collection.

I hope you have the perfect spot for this stitch! Please enjoy! Have a wonderful #whimsicalwednesday!

A Note about Diagrams
I use color in diagrams to make them as clear as possible.  The primary function of different colored lines is to illustrate a stitch sequence.  For example, the layering of colors demonstrates you add them in that order.  They can also provide ideas on integrating additional threads (one line for each color).  Or, you can use the same thread for all color lines.  That's where I encourage you to use your imagination for the space you are stitching!

Well, Well, Well

Well, well, well. My cherished two-sided Santa offered up a gift of a small stitch for us today…the first #smallspacesunday in far too long.

Click image to see the whimsicalstitch.com Stitch Library on pinterest.com. Includes all #whimsicalwednesday and #smallspacesunday stitch diagrams.

Click image to see #whimsicalwednesday and #smallspacesunday Stitched Sample Gallery on Instagram.

The stitched sample is the cutest scarf on the cutest woodland creature. My best guess is I used 5-6 strands of Designer’s Dream (a wonderful wool from back in the day) or Burmilana for the aqua lines and a size 16 Kreinik for the black lines on 13M.

The stitch sequence is straightforward. Starting two rows below the top edge, add a row (two rows wide) of vertical stitches two rows tall. Move ONE row below the first stitches and repeat, gently inserting the needle into the center of the thread immediately above, creating a tiny knit stitch. Since the knit stitches are created in the ditch between two canvas threads, skip two more ditches and repeat the straight stitches. Add a row of tent stitches over the vertical canvas thread in the center of the skipped rows. The stitched sample demonstrates how the stitch is more full coverage than the diagram implies.

One of the most common questions I field in teaching is how to navigate adjacent straight and diagonal stitches. It’s tricky! Straight stitches and diagonal stitches cover canvas threads differently. Diagonal stitches cover vertical and horizontal canvas threads. Vertical straight stitches cover horizontal canvas threads, and horizontal straight stitches cover vertical canvas threads, which can leave the opposite canvas thread mildly to significantly visible. If that visible thread irritates you, heavier thread choices help mitigate this (see below).

I think it is important to keep the appearance of both stitches (diagonal and straight) unobscured. Instinct may tell a stitcher to start the column of tent stitches on the visible canvas thread immediately adjacent to either side of the knit stitch. If you choose to do this, you end up obscuring the knit stitch AND the column of tent stitches. To keep the stitches unobscured, take a moment to see how they meet (parallel or perpendicular).

The stitches in today’s blog are parallel to each other. The straight stitches occupy single columns of holes, and each diagonal stitch occupies two holes (the beginning and the end of the stitch). All holes are occupied, and each stitch is unobscured. When straight and diagonal stitches are perpendicular to each other, they can share a hole where they meet because no stitch is obscured. To visualize that, take a look at the top edge of the scarf and how it meets the diagonal stitches from Santa’s coat.

The threads you choose for a knit stitch need to be a little “extra.” For more full coverage, audition heavier threads and/or up your typical ply count. I like flosses or lightweight strands for knit stitches because it is easier to split stitches with a needle. For fuller coverage, I would use 6-8 strands of Bella Lusso or Burmilana and 7-8 plies of cotton or silk floss. For fuller coverage on 18M, I would use 4-6 strands of Bella Lusso or Burmilana and 5-6 plies of cotton or silk floss. If you want to use metallics for the accent, select one that will confidently cover the canvas thread, such as size 16 Kreinik, Silk Lame 18 or 13, or Frosty Rays for 13M and size 12 Kreinik, Silk Lame 18, or Petite Frosty Rays for 18M.

Disclaimer: This is my perspective on navigating straight and diagonal stitches. Others may have a different point of view. We can politely agree to disagree. If this made your head explode, I apologize. It took me a long time to verbalize how I approached this apparent conundrum. My aha moment was when I realized that single diagonal stitches (tent stitches) occupy two holes. I share that in the hopes it helps my explanation make sense.

Click on image to see the whimsicalstitch.com Stitch Library on pinterest.com. Includes all #whimsicalwednesday and #smallspacesunday stitch diagrams.

Just a reminder about how to evaluate stitches for size on your project.

As you are auditioning stitches (from any stitch source), count the number of canvas threads on the diagram that match your mesh size. And there you have what an inch of the stitch will look like. Evaluate that against the area where you plan to use the stitch and make your final decision. If you start integrating this step into your stitch selection process, you may be surprised at how many stitches you think are large are much smaller than you realize. (Or, in today’s case, the stitch is much larger than it looks.)

By (sometimes) including this step in my own process, I find I am now integrating much longer stitches than I ever thought I would. I used to think a stitch six rows long was super big. I have very much changed my tune, which has helped me expand my creativity, especially for large-space stitches.

Today’s stitch diagram, along with all other #whimsicalwednesday and #smallspacesunday stitch diagrams, can also be found on a Pinterest board here. Be sure to follow whimsicalstitch.com on FacebookPinterestInstagram, and Twitter.

If you like what you see on this blog, there's more. Mary’s Whimsical Stitches is a series of three books offering contemporary how-to collections of more than 250 stitches (in each volume) for all stitchers, regardless of skill level. All books include updated and sequenced diagrams from this blog plus a collection of all-new stitches from private lessons and other class projects. Visit here to find a needlepoint retailer that carries my books.

New to needlepoint or looking for a refresher? Please download a handy how-to guide covering basic needlepoint stitches and stitch compensation techniques along with new top-line information on needlepoint materials and tools, how to handle threads, and other helpful needlepoint resources.

whimsicalstitch.com also sells Stitch Guides and Stitch Concepts for Melissa Shirley Designs, Zecca DesignsSandra Gilmore, Purple Palm, Maggie, and Penny MacLeod, and many more. Click here to see the newest guides and click here to see the entire collection.

I hope you have the perfect spot for this stitch! Please enjoy! Have a wonderful #whimsicalwednesday!

A Note about Diagrams
I use color in diagrams to make them as clear as possible.  The primary function of different colored lines is to illustrate a stitch sequence.  For example, the layering of colors demonstrates you add them in that order.  They can also provide ideas on integrating additional threads (one line for each color).  Or, you can use the same thread for all color lines.  That's where I encourage you to use your imagination for the space you are stitching!
Still Stuck in the 90's

Well, my Melissa Shirley Santas are the gifts that keep on giving. Musical Santa is gifting us with today’s stitch.

Click image to see the whimsicalstitch.com Stitch Library on pinterest.com. Includes all #whimsicalwednesday and #smallspacesunday stitch diagrams.

Click image to see the whimsicalstitch.com Stitch Library on pinterest.com. Includes all #whimsicalwednesday and #smallspacesunday stitch diagrams.

Click image to see #whimsicalwednesday and #smallspacesunday Stitched Sample Gallery on Instagram.

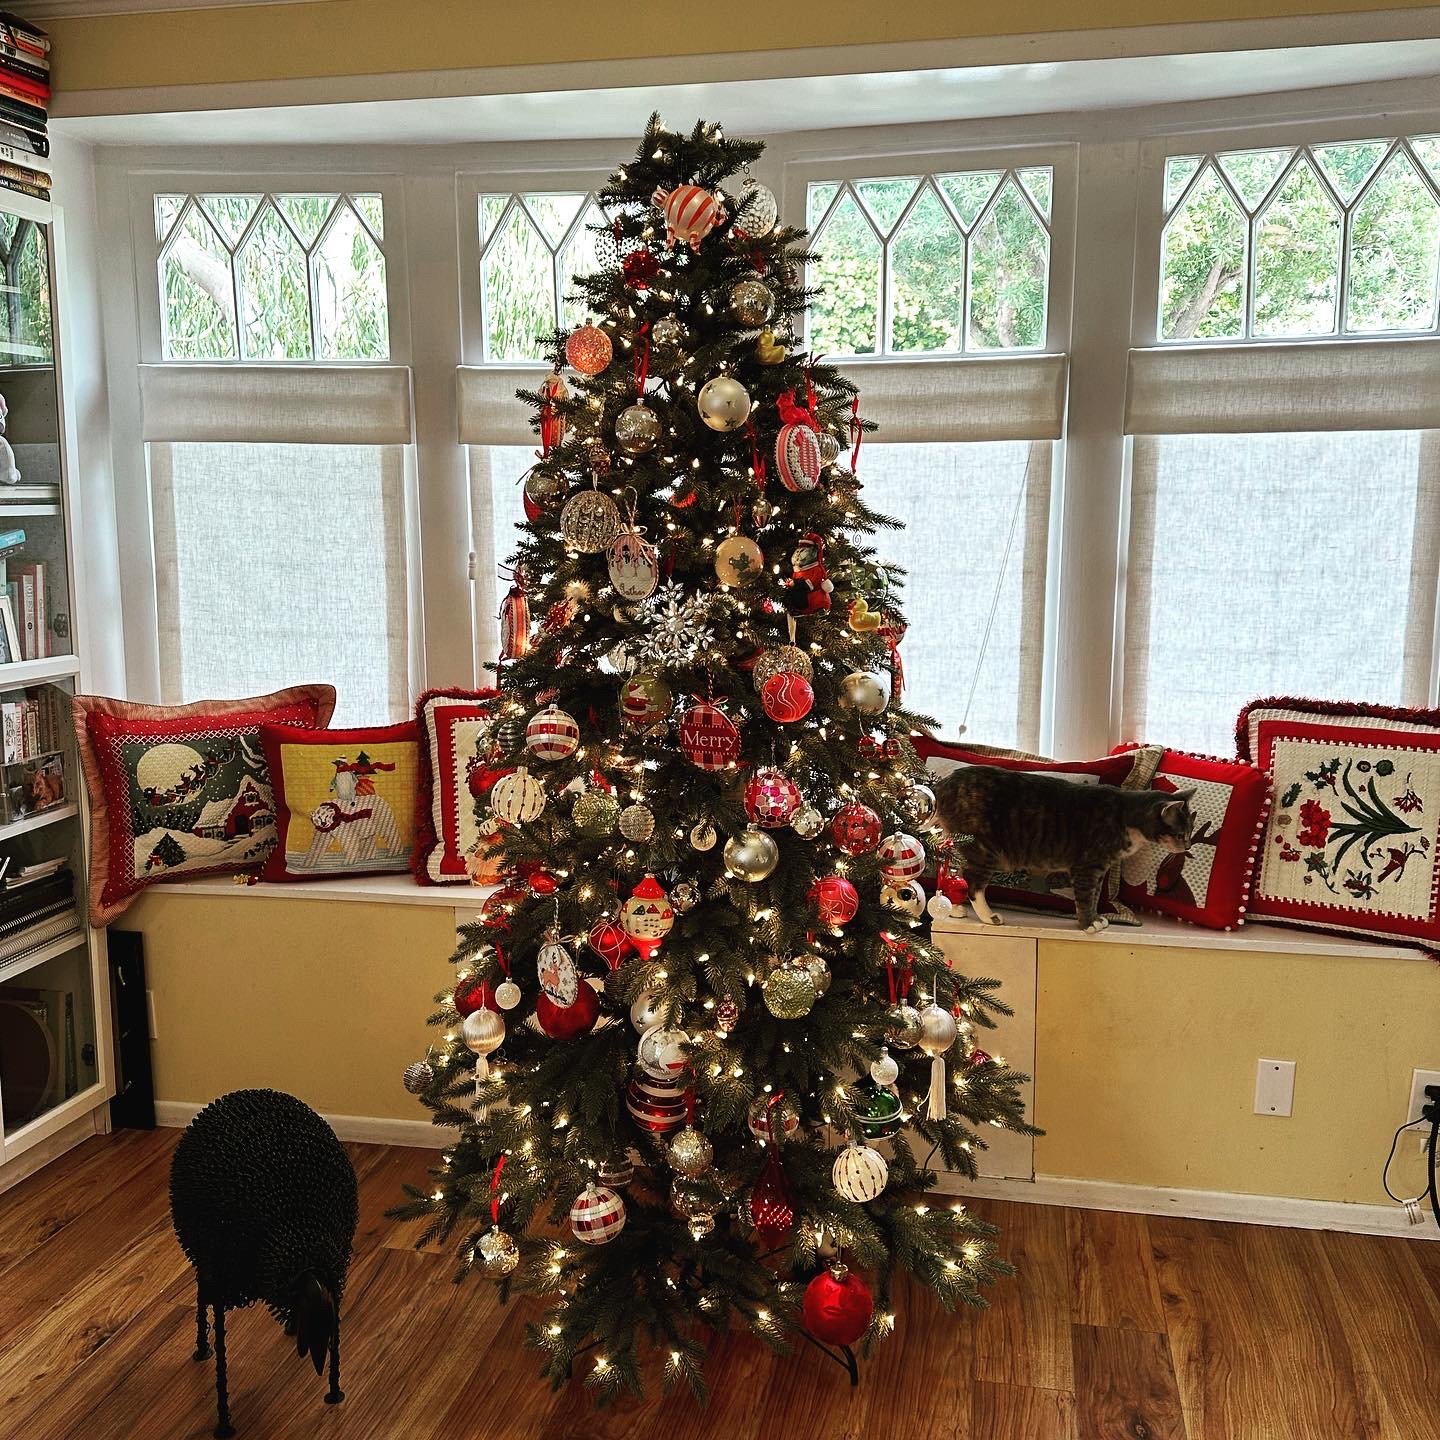
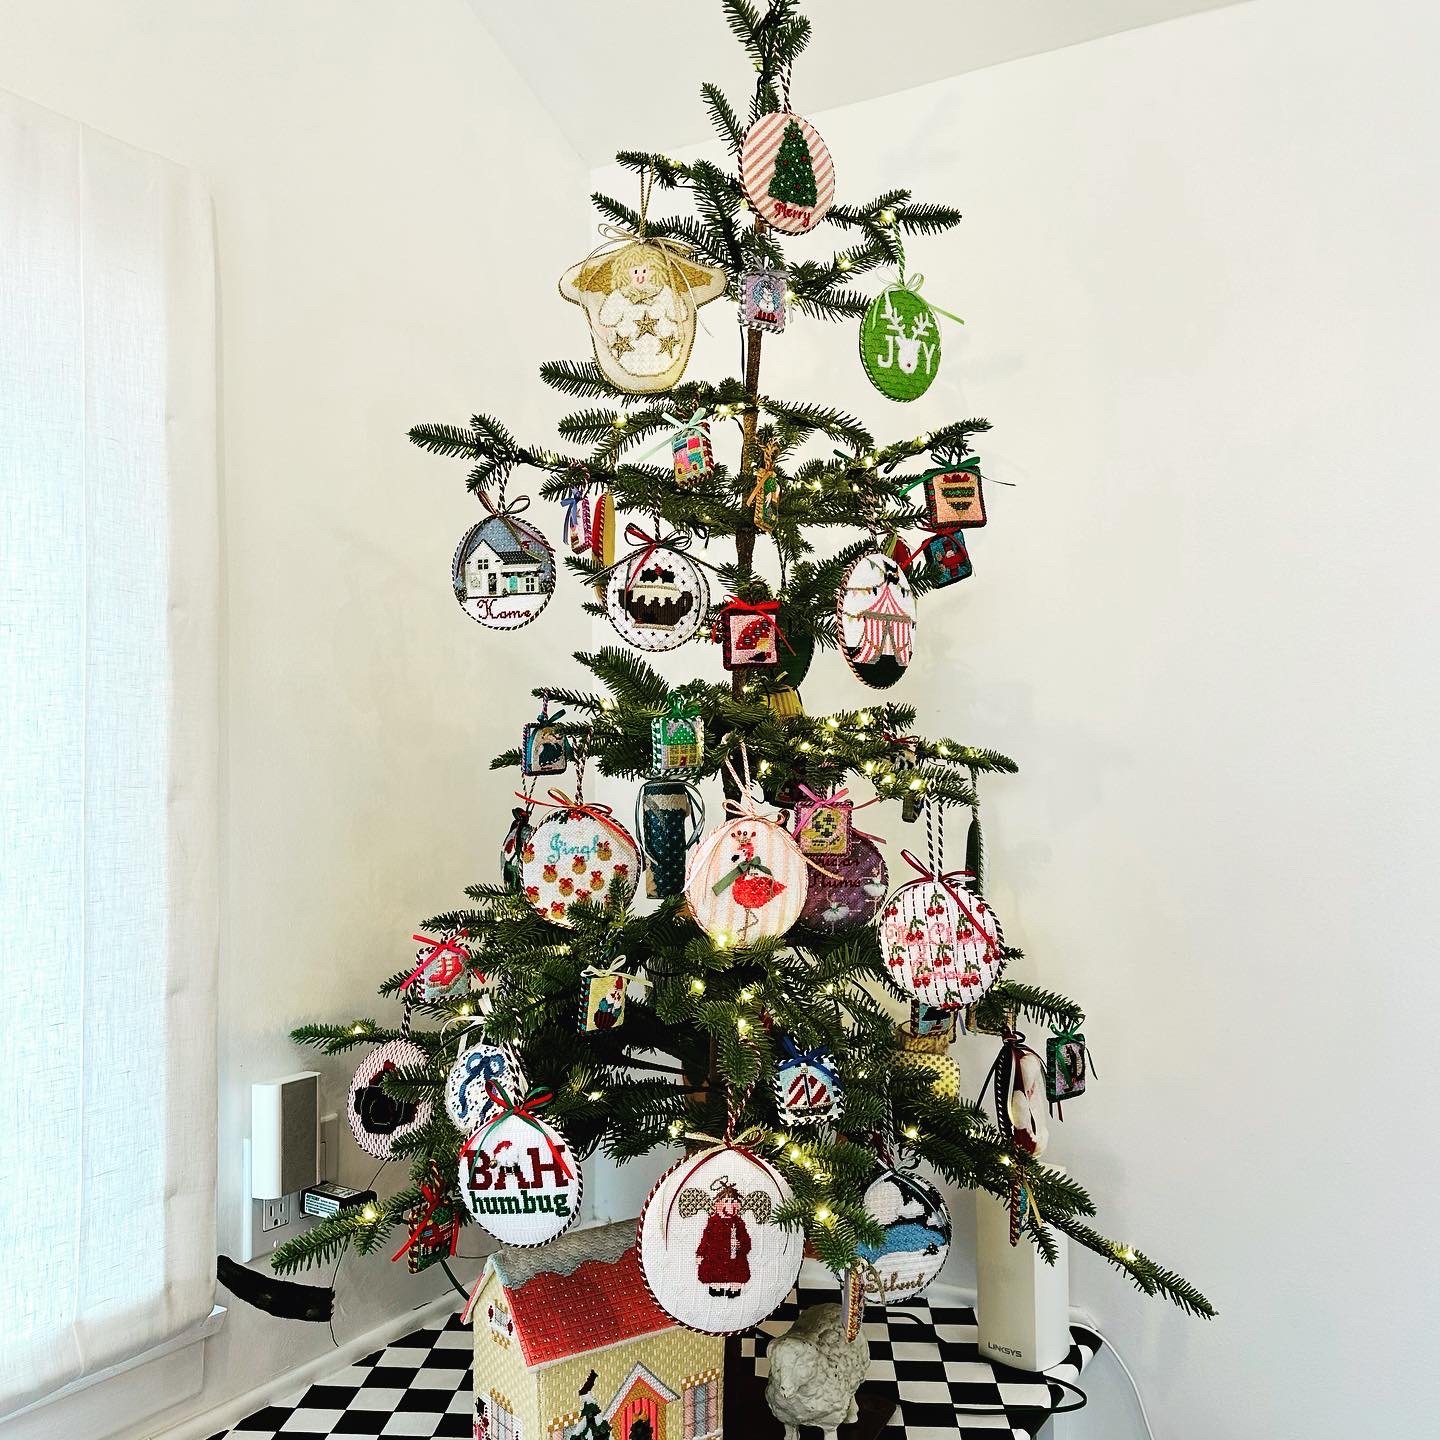
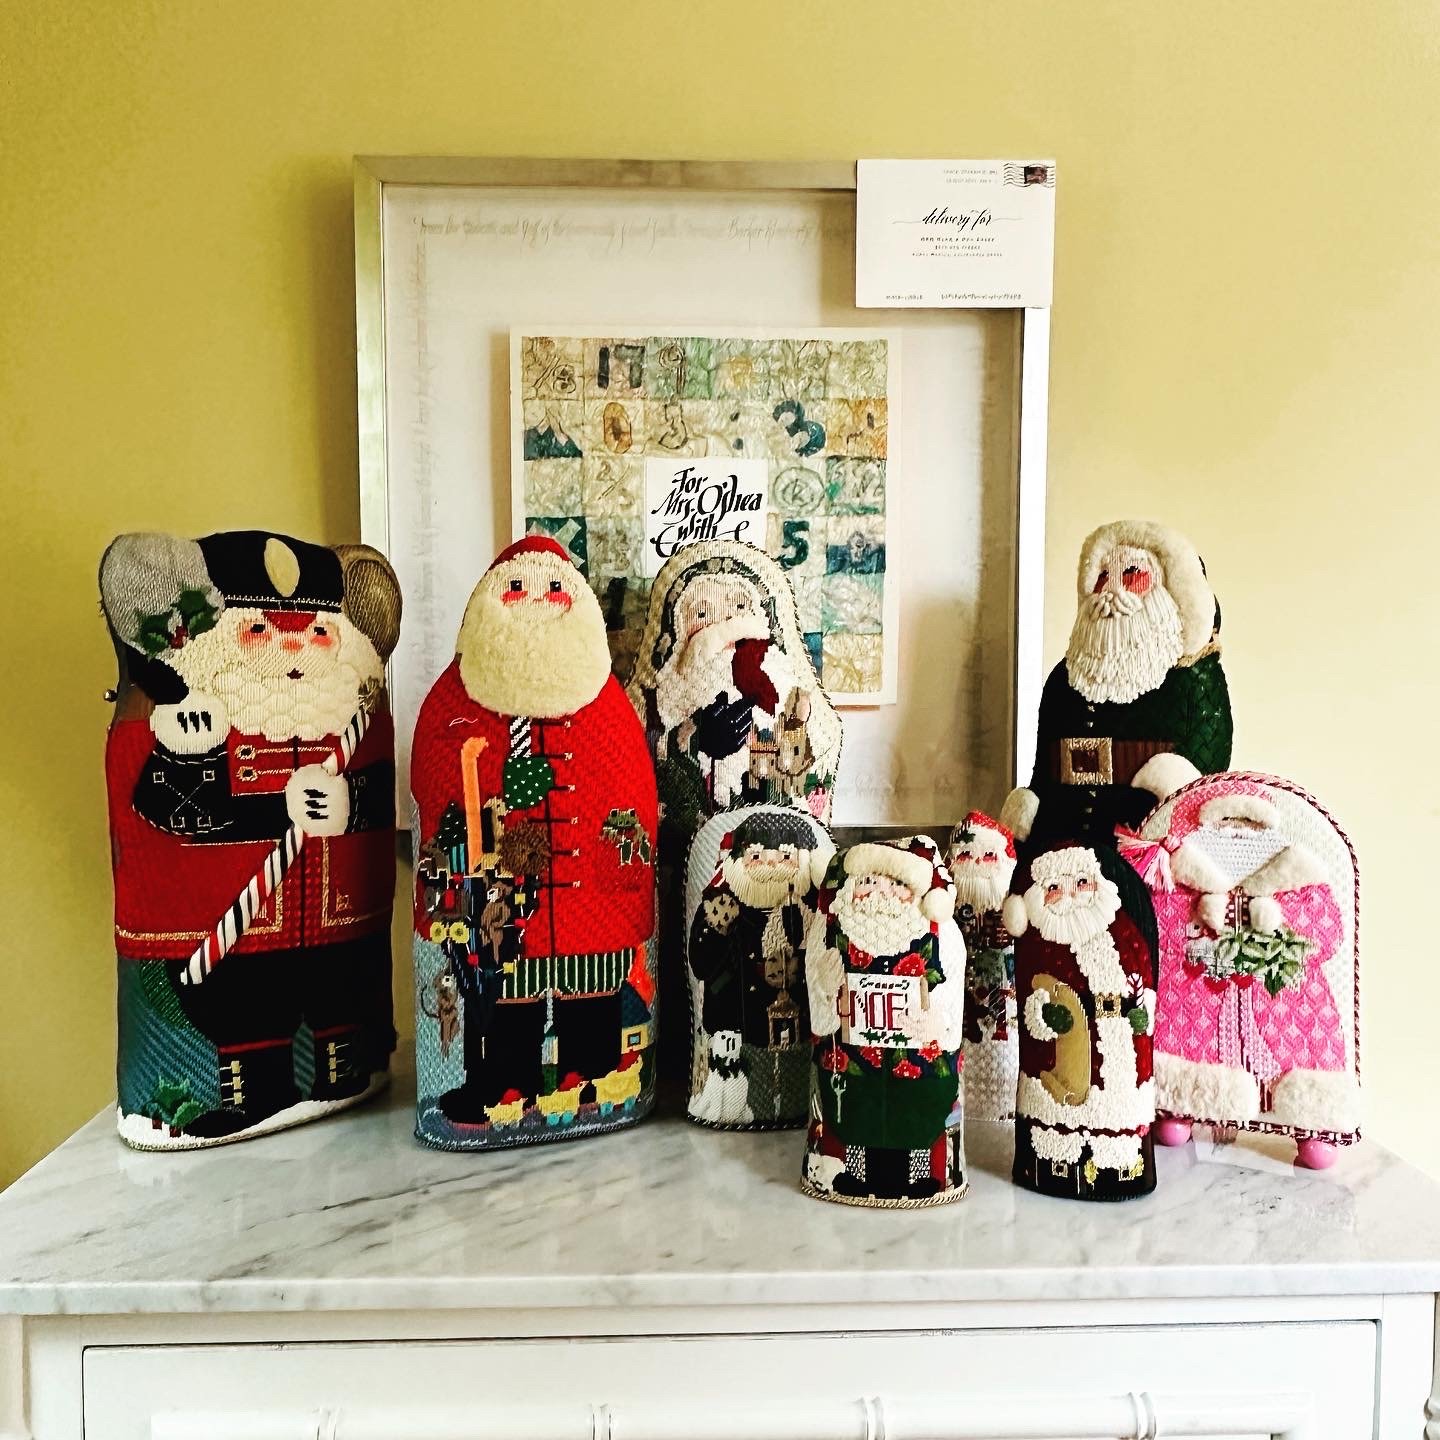
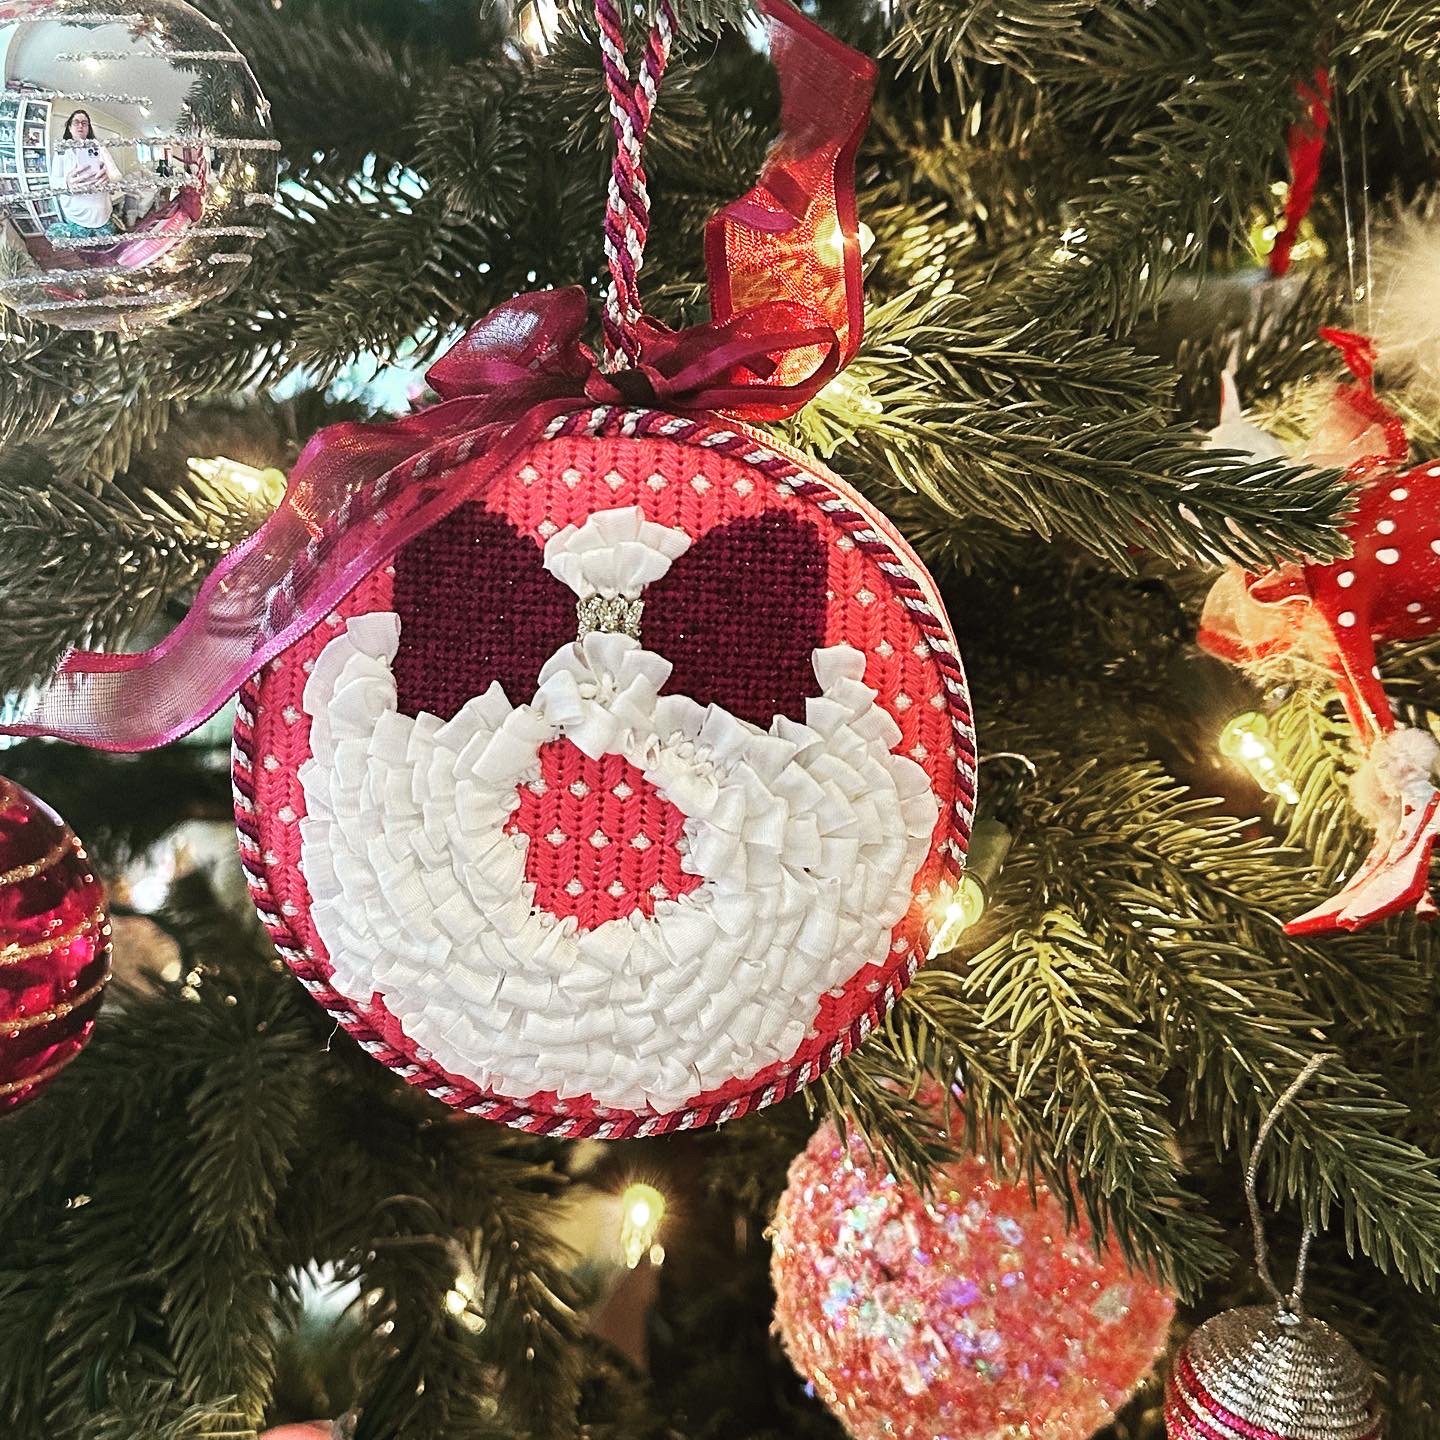
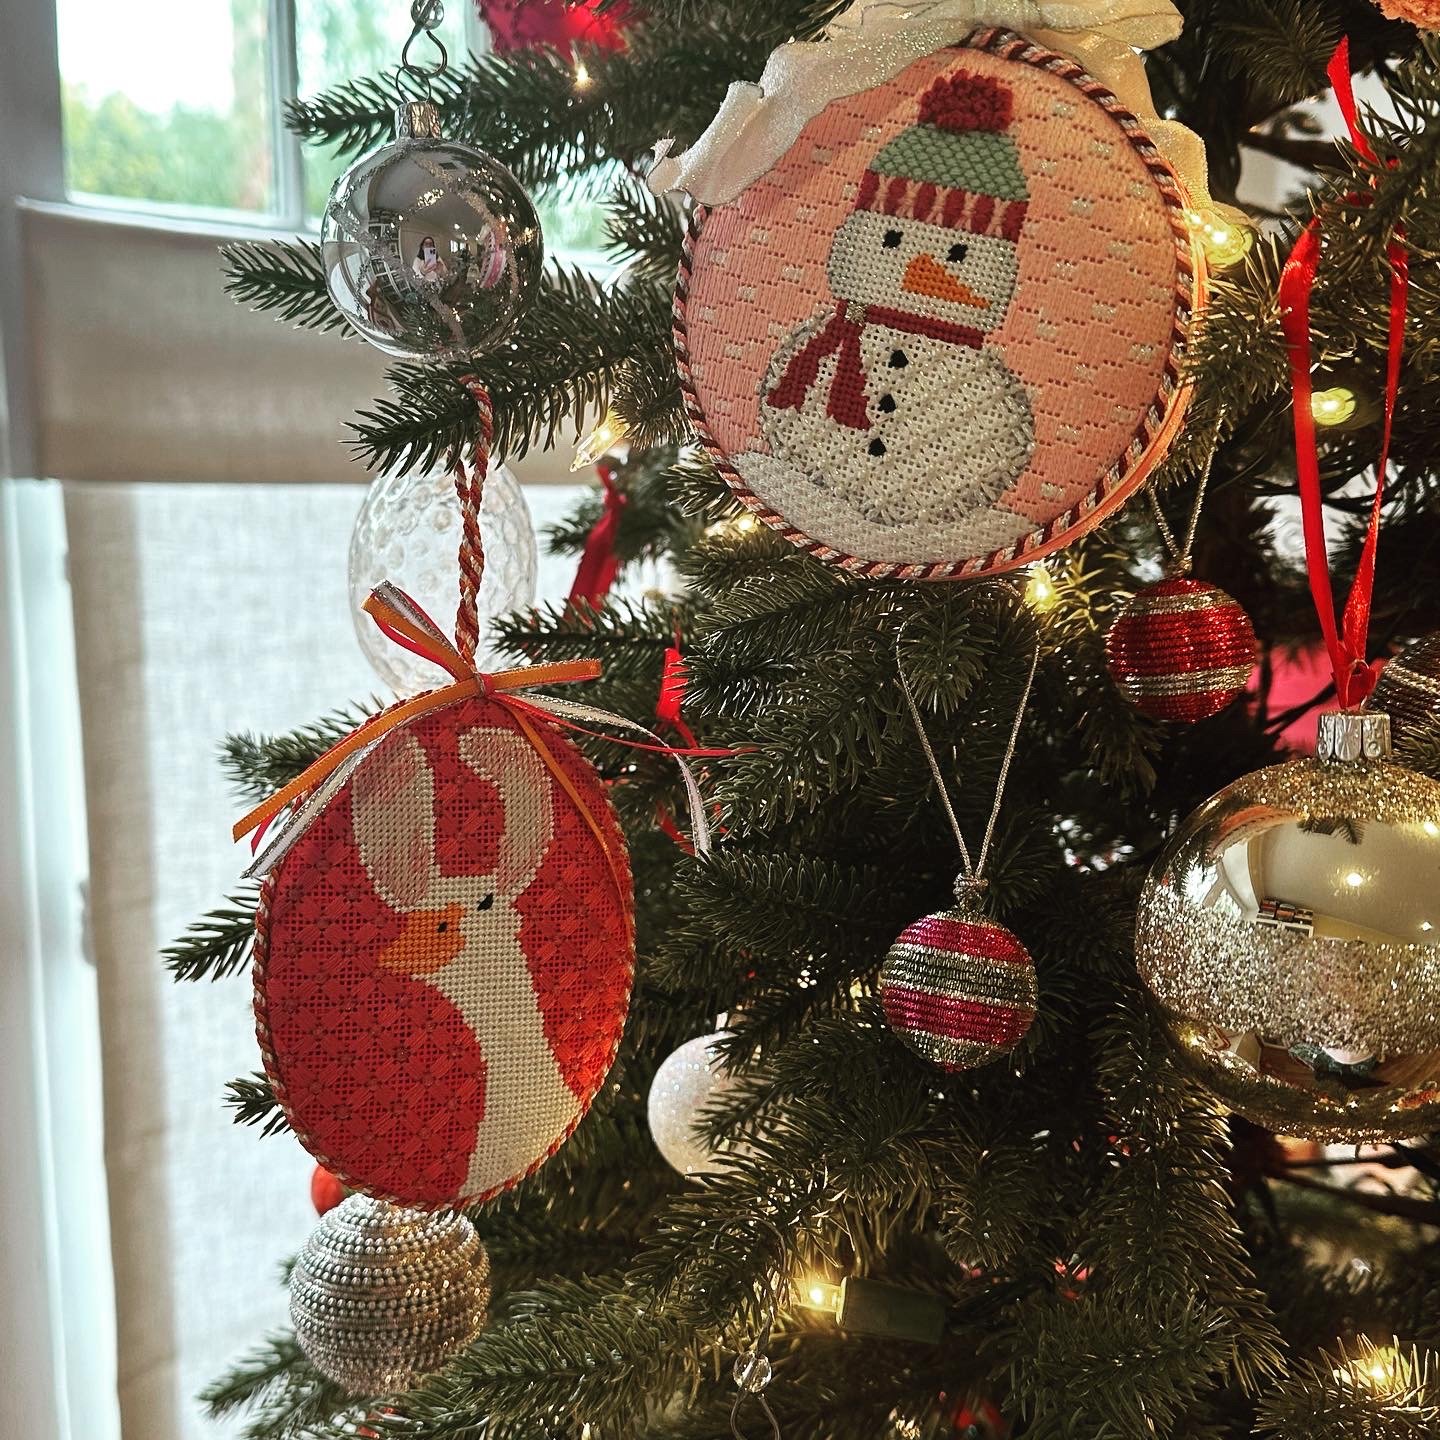
Technically, this stitch was hiding behind the madness of my Santa collection that debuted earlier this month. Visit Instagram to see a sample of my needlepoint Christmas decorations this year.

The stitched sample is from the drum on the b-side of my musical Santa. (I crack myself up sometimes.) I used somewhere between six and eight plies of Splendor on 13M. (Reminder, this piece is from the 90’s. No judging on ply count.)

This is a vexing stitch yet worth your time. I included the repeated element on its own to help your journey. I strongly recommend stitching a complete element before you move on. It will make your life easier, I promise.

The repeated element is 12 rows wide and 12 rows tall, so it requires a good-sized space to get the pattern going. I’ve used it on a large-ish pumpkin back in the day with silk floss and an added X (four rows wide)over the center of the cross. It’s great for clothing, such as a jacket or sweater with Vineyard Silk, Pepper Pot Silk, or beautiful wool thread.

Click on image to see the whimsicalstitch.com Stitch Library on pinterest.com. Includes all #whimsicalwednesday and #smallspacesunday stitch diagrams.

Just a reminder about how to evaluate stitches for size on your project.

As you are auditioning stitches (from any stitch source), count the number of canvas threads on the diagram that match your mesh size. And there you have what an inch of the stitch will look like. Evaluate that against the area where you plan to use the stitch and make your final decision. If you start integrating this step into your stitch selection process, you may be surprised at how many stitches you think are large are much smaller than you realize. (Or, in today’s case, the stitch is much larger than it looks.)

By (sometimes) including this step in my own process, I find I am now integrating much longer stitches than I ever thought I would. I used to think a stitch six rows long was super big. I have very much changed my tune, which has helped me expand my creativity, especially for large-space stitches.

Today’s stitch diagram, along with all other #whimsicalwednesday and #smallspacesunday stitch diagrams, can also be found on a Pinterest board here. Be sure to follow whimsicalstitch.com on FacebookPinterestInstagram, and Twitter.

If you like what you see on this blog, there's more. Mary’s Whimsical Stitches is a series of three books offering contemporary how-to collections of more than 250 stitches (in each volume) for all stitchers, regardless of skill level. All books include updated and sequenced diagrams from this blog plus a collection of all-new stitches from private lessons and other class projects. Visit here to find a needlepoint retailer that carries my books.

New to needlepoint or looking for a refresher? Please download a handy how-to guide covering basic needlepoint stitches and stitch compensation techniques along with new top-line information on needlepoint materials and tools, how to handle threads, and other helpful needlepoint resources.

whimsicalstitch.com also sells Stitch Guides and Stitch Concepts for Melissa Shirley Designs, Zecca DesignsSandra Gilmore, Purple Palm, Maggie, and Penny MacLeod, and many more. Click here to see the newest guides and click here to see the entire collection.

I hope you have the perfect spot for this stitch! Please enjoy! Have a wonderful #whimsicalwednesday!

A Note about Diagrams
I use color in diagrams to make them as clear as possible.  The primary function of different colored lines is to illustrate a stitch sequence.  For example, the layering of colors demonstrates you add them in that order.  They can also provide ideas on integrating additional threads (one line for each color).  Or, you can use the same thread for all color lines.  That's where I encourage you to use your imagination for the space you are stitching!

90's Throwback

Today’s stitch shows up in my home once a year as it is from one of my cherished Melissa Shirley two-sided Santa standups.

Click image to see the whimsicalstitch.com Stitch Library on pinterest.com. Includes all #whimsicalwednesday and #smallspacesunday stitch diagrams.

Click image to see #whimsicalwednesday and #smallspacesunday Stitched Sample Gallery on Instagram.

Technically, this stitch made its debut a few days ago. Visit Instagram to see a sample of my needlepoint Christmas decorations this year.

The stitched sample is 1990’s me stitching with Silk ‘n Ivory (black lines), Neon Rays (yellow lines), Frosty Rays (aqua lines), and Petite Very Velvet (gray lines) on a vintage Melissa Shirley two-sided Santa. (Today’s corresponding Instagram post also includes a full shot of both sides of Santa.)

This is a fantastic full-coverage stitch that is great for clothing. I adore the tiny pop of matte thread (Petite Very Velvet represented by the gray lines in the diagram) surrounded by metallic threads. It’s absolutely yummy. Another great thread combo for clothing is silk floss (five plies for 13M; three plies for 18M) for the black lines, Fyre Werks for the yellow lines, Flair for the aqua lines, and Vineyard Silk (13M) or Essentials (18M) for the gray lines.

I also like the idea of this stitch for a tree that you want to draw attention to in a project. I recommend Vineyard Silk (black lines), Flair (yellow lines), and an overdyed silk floss for the aqua AND gray lines.

Click on image to see the whimsicalstitch.com Stitch Library on pinterest.com. Includes all #whimsicalwednesday and #smallspacesunday stitch diagrams.

Just a reminder about how to evaluate stitches for size on your project.

As you are auditioning stitches (from any stitch source), count the number of canvas threads on the diagram that match your mesh size. And there you have what an inch of the stitch will look like. Evaluate that against the area where you plan to use the stitch and make your final decision. If you start integrating this step into your stitch selection process, you may be surprised at how many stitches you think are large are much smaller than you realize. (Or, in today’s case, the stitch is much larger than it looks.)

By (sometimes) including this step in my own process, I find I am now integrating much longer stitches than I ever thought I would. I used to think a stitch six rows long was super big. I have very much changed my tune, which has helped me expand my creativity, especially for large-space stitches.

Today’s stitch diagram, along with all other #whimsicalwednesday and #smallspacesunday stitch diagrams, can also be found on a Pinterest board here. Be sure to follow whimsicalstitch.com on FacebookPinterestInstagram, and Twitter.

If you like what you see on this blog, there's more. Mary’s Whimsical Stitches is a series of three books offering contemporary how-to collections of more than 250 stitches (in each volume) for all stitchers, regardless of skill level. All books include updated and sequenced diagrams from this blog plus a collection of all-new stitches from private lessons and other class projects. Visit here to find a needlepoint retailer that carries my books.

New to needlepoint or looking for a refresher? Please download a handy how-to guide covering basic needlepoint stitches and stitch compensation techniques along with new top-line information on needlepoint materials and tools, how to handle threads, and other helpful needlepoint resources.

whimsicalstitch.com also sells Stitch Guides and Stitch Concepts for Melissa Shirley Designs, Zecca DesignsSandra Gilmore, Purple Palm, Maggie, and Penny MacLeod, and many more. Click here to see the newest guides and click here to see the entire collection.

I hope you have the perfect spot for this stitch! Please enjoy! Have a wonderful #whimsicalwednesday!

A Note about Diagrams
I use color in diagrams to make them as clear as possible.  The primary function of different colored lines is to illustrate a stitch sequence.  For example, the layering of colors demonstrates you add them in that order.  They can also provide ideas on integrating additional threads (one line for each color).  Or, you can use the same thread for all color lines.  That's where I encourage you to use your imagination for the space you are stitching!