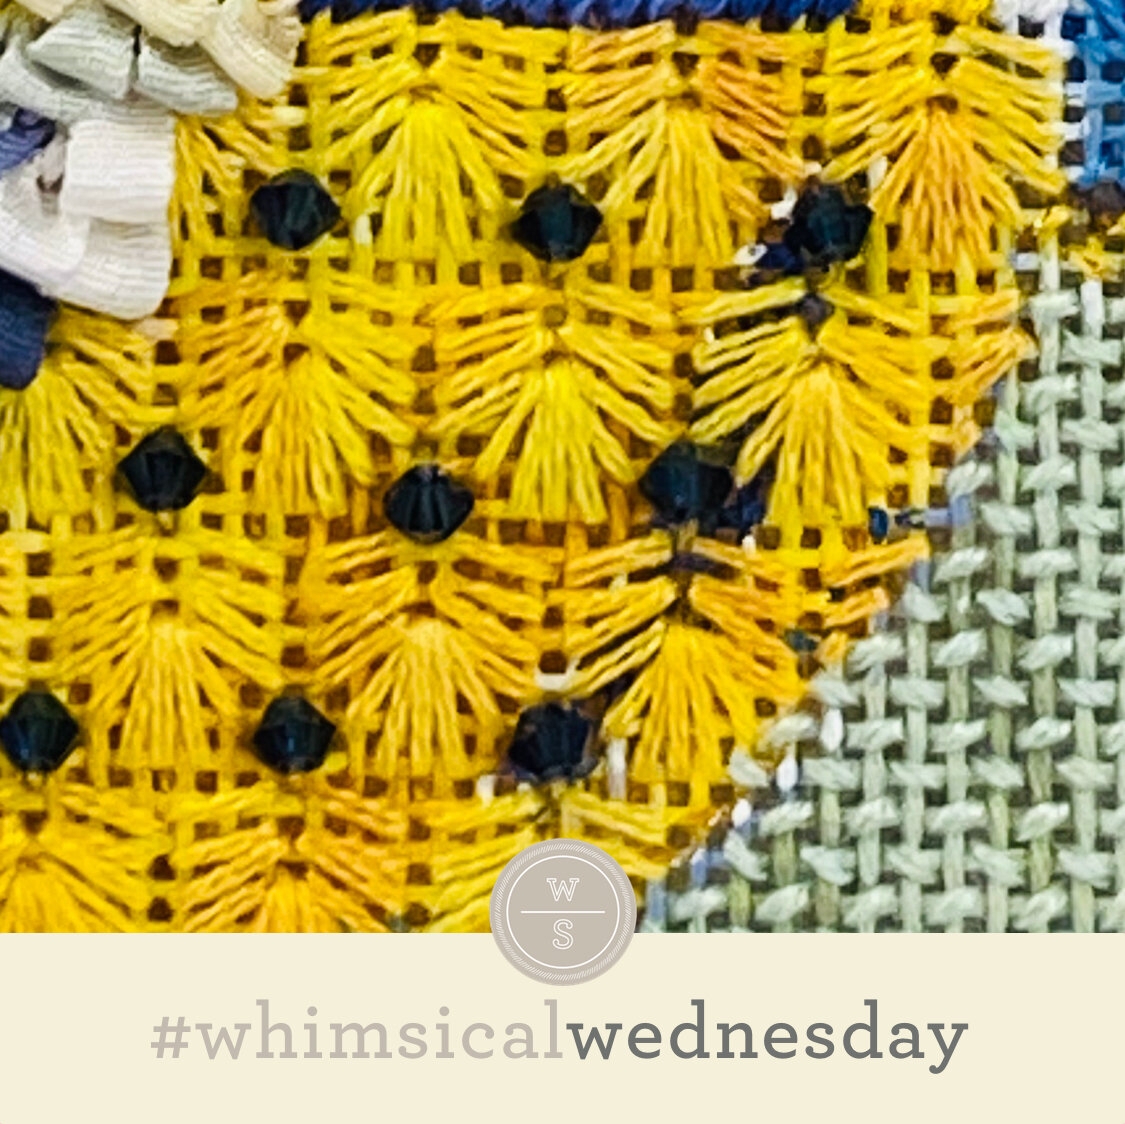
And today’s stitch is a great case study in how to navigate shared holes. It’s also a beautiful stitch and one of those stitches that I get overly excited about when I have an opportunity to use it.
The stitched sample is a beautiful bird from an upcoming Stitch Guide that uses Gloriana Silk Floss (3-ply) and navy blue Swarovski Bi-cones (on 18M). As I mentioned earlier, I love opportunities to use this stitch (or its variants). Flip it upward or 90° in either direction to create the direction you need.
Shared holes are common in virtually all needlepoint. However, a shared hole typically includes two threads. This stitch has multiple shared holes sharing everything from two to seven threads. The best way to minimize wear and tear on your thread and to minimize friction on threads already in the shared hole is to stitch all the stitches from the outer edges to the inside shared hole.
Thought-starters for this stitch include birds, trees, or clothing. I’ve used this stitch for birds with both solid and overdyed silk floss and various beads. I would love to see a more substantial version of this stitch with a metallic that lays flat, such as Flair or Fyre Werks. I would love to see this as a coat with a Pepper Pot Silk and seed bead. And, lastly, I look forward to using it for a Christmas tree with solid silk floss and varied colors of sequins or crystals for the bead accent.
This stitch diagram, along with all other #whimsicalwednesday and #smallspacesunday stitch diagrams, can also be found on a Pinterest board here. Be sure to follow whimsicalstitch.com on Facebook, Pinterest, Instagram, and Twitter.
If you like what you see on this blog, want to learn some very creative decorative stitches, and how to put them all together, whimsicalstitch.com has books (!) for you! Mary’s Whimsical Stitches Volume 1 is a contemporary how-to collection of more than 250 stitches for stitchers regardless of skill level. The book includes updated and sequenced diagrams from this blog, all-new stitches, and a chapter on the basics of needlepoint. For more information, visit here. Volume 2 debuts in January 2021.
whimsicalstitch.com also sells Stitch Guides and Stitch Concepts for Melissa Shirley Designs, Zecca Designs, Sandra Gilmore, Purple Palm, Maggie, and Penny MacLeod, and many more. Click here to see the newest guides and click here to see the entire collection.
I hope you have the perfect spot for this stitch! Please enjoy! Have a wonderful #whimsicalwednesday!
A Note about Diagrams
I use color in diagrams to make them as clear as possible. The primary function of different colored lines is to illustrate a stitch sequence. For example, layering of colors demonstrates you add them in that order. They can also provide ideas on how to integrate additional threads (one line for each color). Or, you can use the same thread for all color lines. That's where I encourage you to use your imagination for the space you are stitching!


