You know how you always find something when you aren’t looking for it? Well, today’s stitch came from that random piece of scratch paper that I scribbled on for a student a while ago. It showed up on Monday when I was looking for something else. I am not complaining, and I hope you like it, too.
Most of my Nobuko stitches are perfectly symmetrical, as illustrated here and here. Today’s stitch is an excellent example of how scaleable Nobuko can be, allowing you to tailor the stitch to your area.
The stitched sample shows me playing with two plies of Soie d’Alger (black lines) and Petite Silk Lame (turquoise lines). I love the height the stitch adds to an area, such as a pair of pants or a coat. Flip it 90° for a roof where the stitch adds width to the area. You can also fill the empty rows with a third thread for full coverage!
In addition to the areas mentioned above, I’m looking forward to using this for greenery. For example, use it for a tree trunk with an overdyed brown silk floss for all lines. Flipping it 90° for a hedge will be very pretty as well. I would use a solid green silk for the black lines and an overdyed green silk for the turquoise lines.
I hope you have the perfect spot for it. Enjoy it!
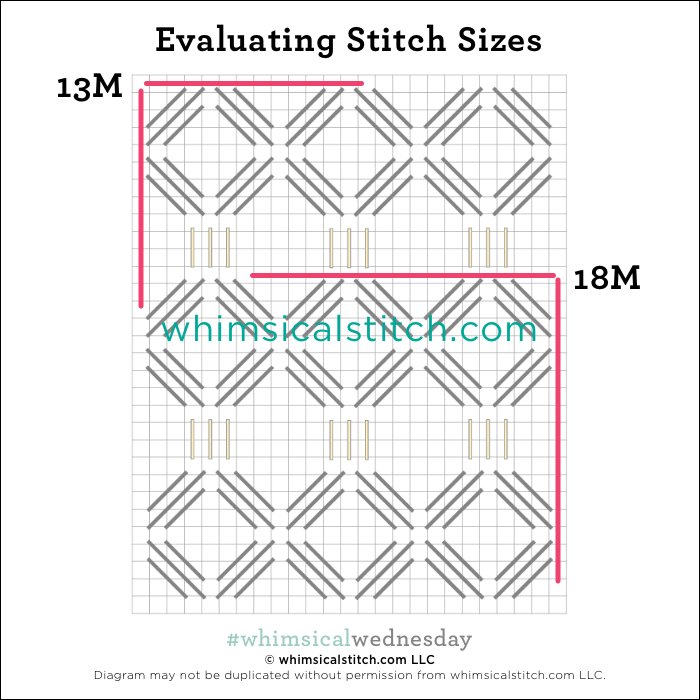
As you are auditioning stitches (from any stitch source), count the number of canvas threads on the diagram that match your mesh size. And there you have what an inch of the stitch will look like. Evaluate that against the area where you plan to use the stitch and make your final decision. If you start integrating this step into your stitch selection process, you may be surprised at how many stitches you think are large are much smaller than you realize.
By (sometimes) including this step in my own process, I find I am now integrating much longer stitches than I ever thought I would. I used to think a stitch six rows long was super big. I have very much changed my tune, which has helped me expand my creativity, especially for large-space stitches.
Today’s stitch diagram, along with all other #whimsicalwednesday and #smallspacesunday stitch diagrams, can also be found on a Pinterest board here. Be sure to follow whimsicalstitch.com on Facebook, Pinterest, Instagram, and Twitter.
If you like what you see on this blog, there's more. Mary’s Whimsical Stitches is a series of four books offering contemporary how-to collections of more than 200 stitches (in each volume) for all stitchers, regardless of skill level. All books include updated and sequenced diagrams from this blog, plus a collection of all-new stitches from private lessons and other class projects. Visit here to find a needlepoint retailer that carries my books.
New to needlepoint or looking for a refresher? Please download a handy how-to guide covering basic needlepoint stitches and stitch compensation techniques along with new top-line information on needlepoint materials and tools, how to handle threads, and other helpful needlepoint resources.
whimsicalstitch.com also sells Stitch Guides and Stitch Concepts for Melissa Shirley Designs, Zecca Designs, Sandra Gilmore, Purple Palm, Maggie, and Penny MacLeod, and many more. Click here to see the newest guides and click here to see the entire collection.
I hope you have the perfect spot for this stitch! Please enjoy! Have a wonderful #whimsicalwednesday!
A Note about Diagrams
I use color in diagrams to make them as clear as possible. The primary function of different colored lines is to illustrate a stitch sequence. For example, the layering of colors demonstrates you add them in that order. They can also provide ideas on integrating additional threads (one line for each color). Or, you can use the same thread for all color lines. That's where I encourage you to use your imagination for the space you are stitching!


