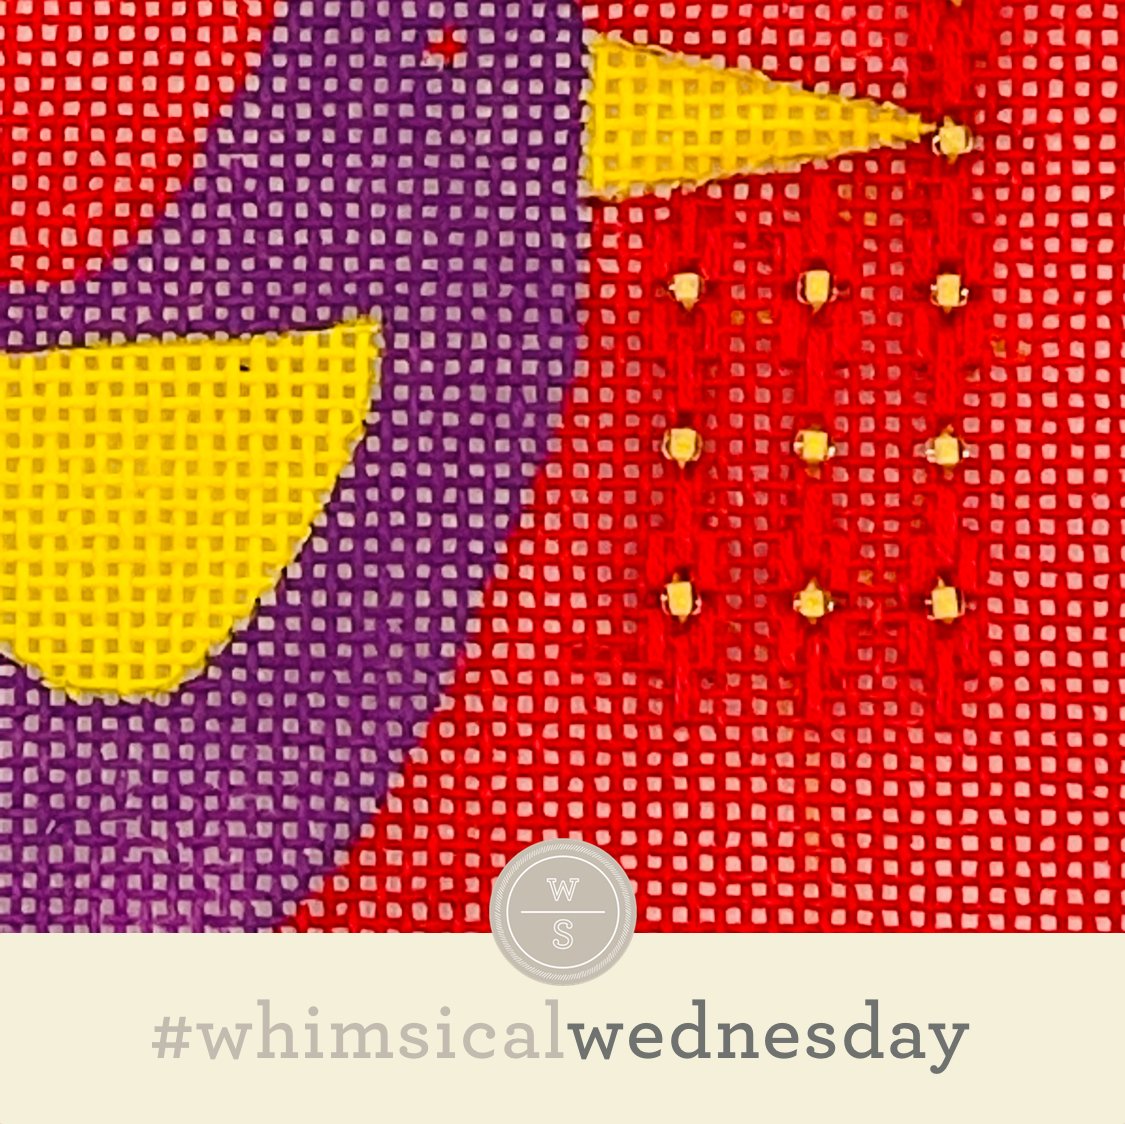
Today’s stitch is the background from a cute little Santa stand-up one of my favorite stitchers is working on. Truth be told, Byzantine stitches are not top of mind for me but I always like them when I see them. Weird, huh?
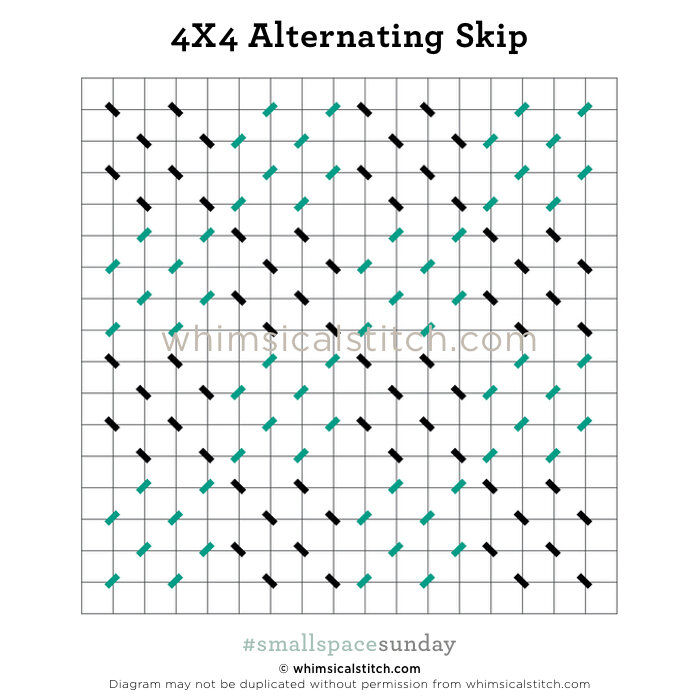
Today’s stitch is a Tall Byzantine (three rows wide and nine rows tall). The stitched sample uses Pepper Pot Silk on 18M. (The two-fer is NOT the two diagrams. The two-fer is that other stitching on this project will be revealed on this upcoming Sunday as well as a full shot of the Santa.)
I’ve talked about Byzantines before and can offer a variety of earlier examples (here and here). One thing that stands out for me with today’s stitch is the height (obviously). I love how the long vertical columns accentuate the tall, narrow Santa (that you will see next Sunday). Yet, what I really love about this stitch is the horizontal version. Flip the diagram 90° and you have a fantastic water stitch, giving you the ebb and flow of a lake or ocean. It’s really fascinating how the two different directions offer completely different looks.
In addition to backgrounds, I love the tall version for clothing, such as pants or jackets, even a flapper’s dress. Single strand silks or silk floss are excellent choices for those. To jazz it up, consider alternating columns between two different threads (color, finish, or both). You can also fill the empty rows with tent stitches in a contrasting thread for a little more attention. I would love to see the flapper’s dress with silk floss and the empty rows filled with beads! The horizontal version works well for water with Kreinik Metallic or a Petite Silk Lame. It will also make a great ground cover with an overdyed floss or perle cotton.
These stitch diagrams, along with all other #whimsicalwednesday and #smallspacesunday stitch diagrams, can also be found on a Pinterest board here. Be sure to follow whimsicalstitch.com on Facebook, Pinterest, Instagram, and Twitter.
IIf you like what you see on this blog, there's more: Mary’s Whimsical Stitches Volume 1 is a contemporary how-to collection of more than 250 stitches for stitchers regardless of skill level. The book includes updated and sequenced diagrams from this blog, all-new stitches, and a chapter on the basics of needlepoint; Mary’s Whimsical Stitches Volume 2 features chapters on Balanced, Beading, Diagonal, Layered, Oblique, Small, and Straight stitches.
Also, you can download for free the first chapter from my first book which covers basic needlepoint stitches and stitch compensation techniques along with new top-line information on needlepoint materials and tools, how to handle threads, and other helpful needlepoint resources.
whimsicalstitch.com also sells Stitch Guides and Stitch Concepts for Melissa Shirley Designs, Zecca Designs, Sandra Gilmore, Purple Palm, Maggie, and Penny MacLeod, and many more. Click here to see the newest guides and click here to see the entire collection.
I hope you have the perfect spot for this stitch! Please enjoy! Have a wonderful #whimsicalwednesday!
A Note about Diagrams
I use color in diagrams to make them as clear as possible. The primary function of different colored lines is to illustrate a stitch sequence. For example, layering of colors demonstrates you add them in that order. They can also provide ideas on how to integrate additional threads (one line for each color). Or, you can use the same thread for all color lines. That's where I encourage you to use your imagination for the space you are stitching!


