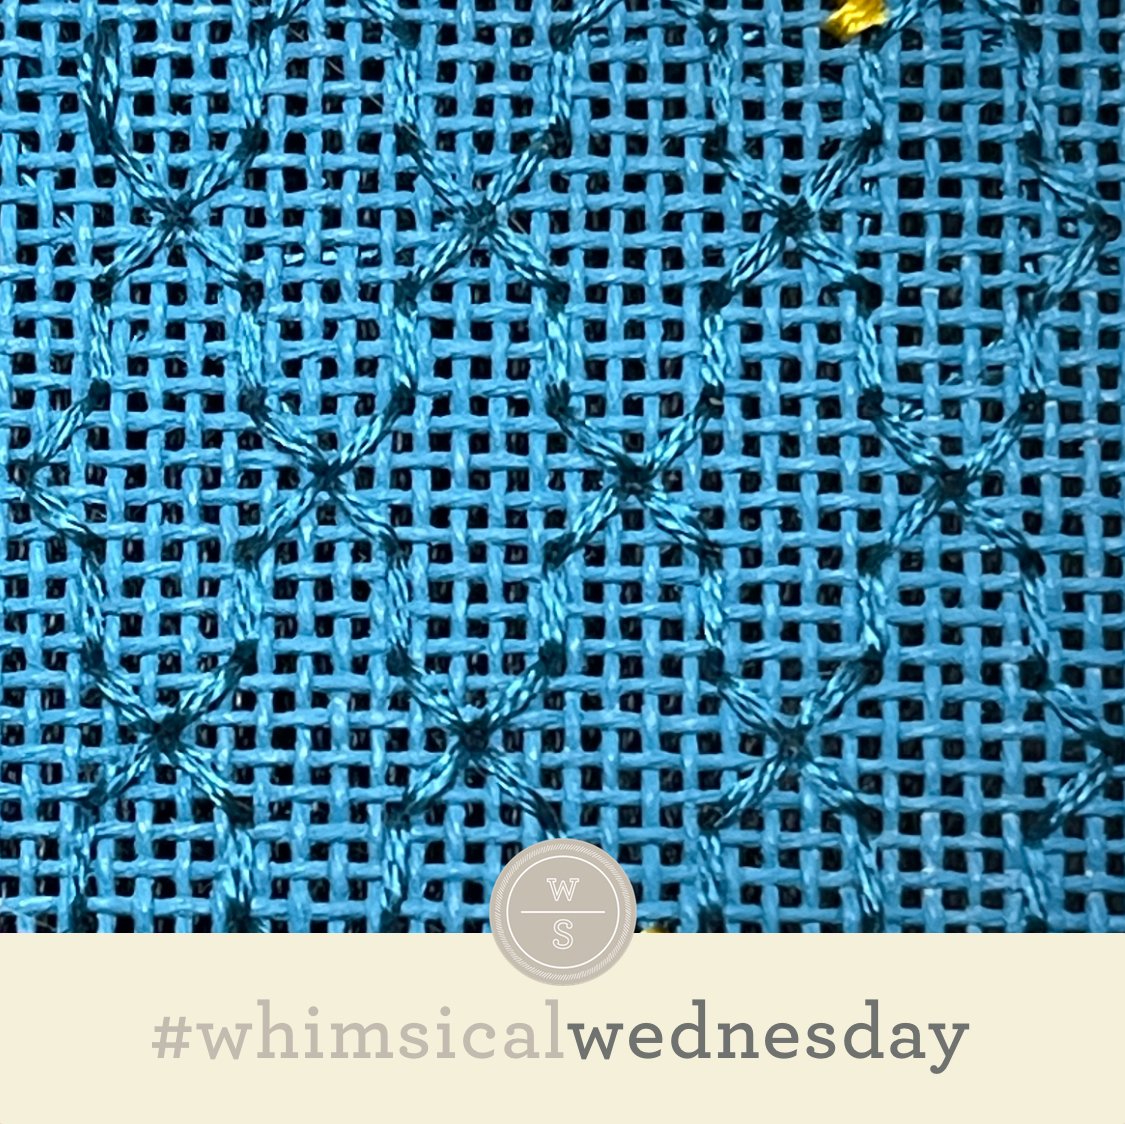
I certainly went down a stitching rabbit hole last night. I love where I landed but it was certainly a circuitous route.
I discovered the general shape for the Diamond Keyholes stitch on Instagram. The stitched sample is me playing with two plies of Soie d’Alger on 18M. The stitch is larger than I anticipated, even on 18M. I love how the openness of the stitch lends itself to an interesting background that will do just that…stay in the background. I am already envisioning a variation with a couple of vertical rows in between the individual keyhole shapes for an even more subtle background (or wallpaper or floor).
Finding something to fill the keyholes was the very interesting journey I alluded to earlier. After a LOT of trial and error, I landed on a smaller keyhole (inside the larger keyhole) and NOT repeated in every keyhole.
I did not photograph every filling I tried because I wasn’t thrilled with the end results. Simply put, most of the attempts drowned out the larger keyhole, which is how I ended up with the smaller keyhole in select locations, allowing the larger outline shape to dominate. It was an interesting journey (for me), as I was confident it was going to be an easy shape to fill. Oops.
Either version will work well as a background or as architectural elements. I’m looking forward to using the filled version with two different color threads for a floor. If it’s a kitchen, the threads will be lightweight metallic, such as Petite Silk Lame. If it’s a hardwood floor in a hallway or dining room, I’ll use two shades of brown silk floss. For the top diagram, it will be a new go-to for backgrounds. I can’t wait to find that perfect piece where I can alternate colors between vertical columns. For some reason, I’ve got pink and white columns on my mind. That will be adorable. I love lightweight single strand threads for backgrounds, such as silk perle or perle cotton (e.g., Elegance or DMC size 8 perle cotton).
These stitch diagrams, along with all other #whimsicalwednesday and #smallspacesunday stitch diagrams, can also be found on a Pinterest board here. Be sure to follow whimsicalstitch.com on Facebook, Pinterest, Instagram, and Twitter.
IIf you like what you see on this blog, there's more: Mary’s Whimsical Stitches Volume 1 is a contemporary how-to collection of more than 250 stitches for stitchers regardless of skill level. The book includes updated and sequenced diagrams from this blog, all-new stitches, and a chapter on the basics of needlepoint; Mary’s Whimsical Stitches Volume 2 features chapters on Balanced, Beading, Diagonal, Layered, Oblique, Small, and Straight stitches.
Also, you can download for free the first chapter from my first book which covers basic needlepoint stitches and stitch compensation techniques along with new top-line information on needlepoint materials and tools, how to handle threads, and other helpful needlepoint resources.
whimsicalstitch.com also sells Stitch Guides and Stitch Concepts for Melissa Shirley Designs, Zecca Designs, Sandra Gilmore, Purple Palm, Maggie, and Penny MacLeod, and many more. Click here to see the newest guides and click here to see the entire collection.
I hope you have the perfect spot for this stitch! Please enjoy! Have a wonderful #whimsicalwednesday!
A Note about Diagrams
I use color in diagrams to make them as clear as possible. The primary function of different colored lines is to illustrate a stitch sequence. For example, layering of colors demonstrates you add them in that order. They can also provide ideas on how to integrate additional threads (one line for each color). Or, you can use the same thread for all color lines. That's where I encourage you to use your imagination for the space you are stitching!


